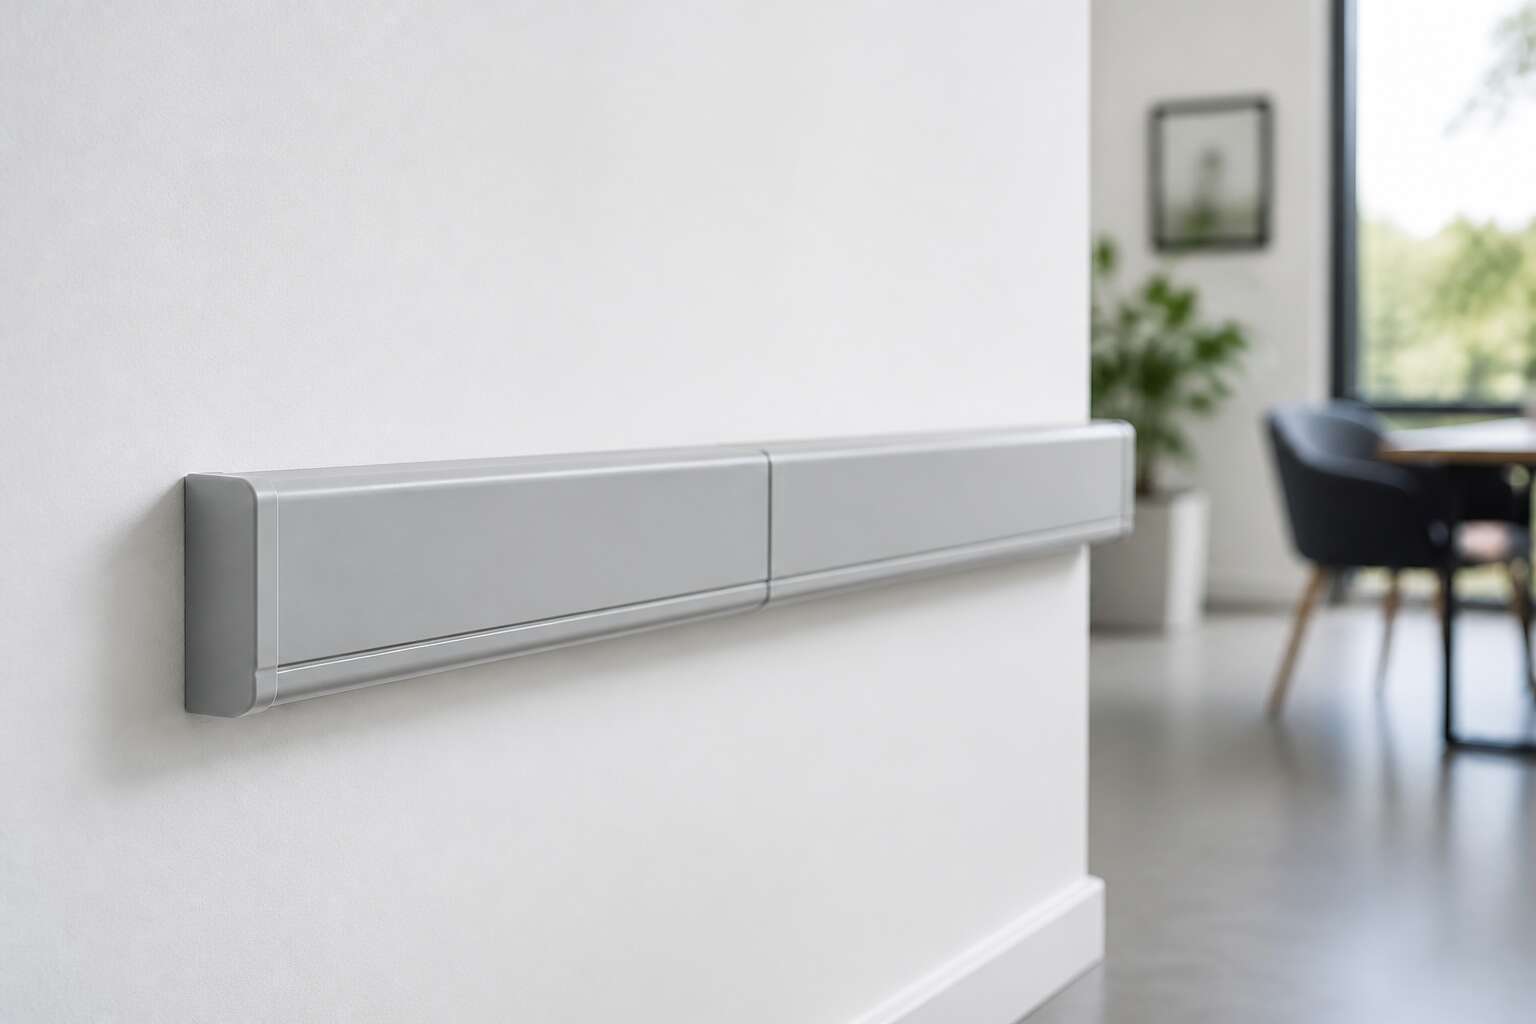
Understanding Grey Trunking Systems
What Is Grey Trunking and How Does It Work?
Trunking grey rarely makes headlines, yet every commercial building in South Africa relies on it. This unassuming PVC conduit carries electrical cables safely along walls and ceilings. The grey colour is standardised, so painters and electricians can spot it instantly.
The system works on a simple principle. A rigid channel fixes to the surface, cables drop inside, and a snap-on lid seals the lot. No adhesive, no special tools. That simplicity explains why this material persists in an industry obsessed with innovation.
Consider what makes it the default choice:
- It hides unsightly wiring without plasterwork
- It allows quick access to cables for maintenance
- It resists impact and moisture in demanding environments
For electricians in Cape Town or Johannesburg, this reliability matters more than aesthetics. Trunking grey earns its place on every specification sheet.
Primary Materials: PVC, Steel, and Aluminium
Trunking grey appears uniform, but the material underneath varies significantly. Three options dominate the South African market. PVC is light, non-conductive, and simple to work with. Steel handles heavy abuse and fire conditions, though it weighs more. Aluminium sits between the two, offering corrosion resistance and a manageable weight for overhead runs.
The standard grey finish ensures visual consistency across all three.
- PVC: suitable for internal walls and ceilings where moisture is minimal.
- Steel: specified for industrial plants, parking garages, and exposed areas.
- Aluminium: useful in coastal regions where salt air attacks other metals.
Regional conditions often dictate the final choice. A facility in Durban may require aluminium due to the humid coastal air, while a warehouse in Gauteng can rely on steel or PVC.
Typical Applications in Residential and Commercial Spaces
Imagine walking through a Johannesburg office park at 9am. The grey raceways along the corridors lead to network cabinets and power outlets. Trunking grey is everywhere, but its presence is so ordinary that nobody notices it. That is the quiet work of a well designed electrical installation.
In homes, it appears less frequently. Where exposed wiring is necessary, such as a garage or a high ceiling, trunking grey keeps the look tidy. Electricians install it to bring power to air conditioners or geysers without cutting into finished walls. For residential renovations, it offers a practical path when chasing cables into plaster is too disruptive.
- Retail stores use trunking grey to hide point of sale cable runs along display walls.
- Warehouses run it overhead for high bay lighting circuits.
- Residential lofts use it on exposed brick to keep wiring accessible for future changes.
The material choice shifts with the space, but the colour remains constant. That matters in commercial interiors where visual chaos is the enemy. A coastal holiday home might need aluminium while an inner city flat uses PVC. Trunking grey simply disappears into the background, letting the architecture speak.
Advantages of Grey Over Other Colour Options
The colour of a conduit seems trivial until you see a warehouse at dawn, with raw concrete and steel shelving. Grey matches the weight of those materials, while white stands out. This colour serves a psychological function before any electrical one.
Compared to white, grey hides the grime of industrial air. Compared to black, it reflects more light and softens contrast against pale ceilings. Grey aligns with the standard South African commercial palette, where neutral tones dominate. It does not conflict with the wall, skirting, or door frame.
- Dust and scuff marks blend into grey surfaces.
- Grey pairs with concrete, steel, and stone.
- Repainting is simpler since grey tolerates mismatches.
Architects specify trunking grey for its quiet presence. In exposed wiring, the colour blends into surrounding surfaces. That consistency lets the eye focus on people and products, not plastic runs along the wall.
Selecting the Right Grey Trunking for Your Project
Sizing and Capacity Calculations Made Simple
Selecting the correct cross section for trunking grey demands more than a quick glance at the cable diameter. I have seen installations stall in Johannesburg because the steel trunking cavity was measured incorrectly. Begin by summing the actual cross sectional area of each conductor. Then apply a 1.4 multiplier to account for heat dissipation and future cable pulls. This simple calculation prevents the dreaded overstuffing that damages insulation.
For multi tier runs, consider these factors:
- Bend radii of the cables
- Sealing requirements at joints
- Support spacing for vertical risers
Capacity calculations using trunking grey become straightforward when you treat the trough as a volume, not a width. Monitor the fill ratio against the manufacturer’s rated maximum. Stay under seventy percent for reliable performance.
Considering Fire Safety and Halogen-Free Materials
Fire behaviour is the hidden variable in any electrical installation. In South Africa, building regulations increasingly demand materials that do not turn a cable fault into a toxic hazard. The composition of your trunking grey affects how flames and smoke propagate through a riser or ceiling void.
Halogen free materials produce less corrosive gas when they burn. That is a significant advantage in spaces like hospitals or data centres; equipment failure from smoke damage causes secondary losses. When comparing products, examine the smoke density rating and the halogen content stated on the datasheet. Ask for the SANS test reports directly! A product labelled as trunking grey can hide different base polymers underneath.
- Low smoke zero halogen compounds suit occupied buildings.
- Steel trunking for areas requiring mechanical protection and fire containment.
The choice becomes part of the building’s fire strategy, whether you plan for it or not.
IP Ratings and Environmental Protection Levels
An IP rating is a compact set of numbers with a specific meaning. For trunking grey, the two digits after the letters indicate exactly what the enclosure can resist. The first digit covers solid particles, from dust to debris. The second digit covers water, from light condensation to direct hosing. A textile mill in Cape Town with floating fibres demands a different product than a coastal retail unit exposed to sea spray.
The actual environment dictates the specification:
- IP40 for clean indoor areas with no moisture risk
- IP44 for covered outdoor spots with splash protection
- IP65 for dusty floors and jet washing
The trunking grey you select must match the real conditions on site. Moisture inside a conduit degrades cable insulation over time. Dust acts as an abrasive and a thermal layer. Matching the rating to the room extends the working life of every conductor inside the system.
Accessories, Fittings, and Compatible Components
Selecting the right trunking grey is the easy part. The fittings are where the real decisions hide. A corner joint, an end cap, or a coupler can turn a neat installation into a professional finish or a frustrating gap. South African electricians know this well, especially when retrofitting older buildings where the walls are rarely square.
The accessories must match the trunking grey profile exactly. Internal dimensions, lid type, and locking mechanisms all play a role. Mixing brands is possible, but it invites headaches. The manufacturer’s specification sheet is the final authority.
- Couplers align with the lid seam
- End caps fit snugly without forcing
- Internal bends accommodate the cable radius
Compatible components vary between manufacturers. A little patience at the planning stage saves a great deal of swearing on site.
Matching Trunking to Cable Load and Future Expansion
A 2023 survey of South African electrical contractors found that nearly sixty percent of trunking grey retrofits stem from an undersized original channel. The cables that fit comfortably on day one are often bursting by year three.
Future expansion changes the maths. A home’s cable load grows quietly with each new appliance, solar inverter, or fibre line, and a profile that handles today’s 2.5 mm² wiring may choke on tomorrow’s additions.
The pre-installation check:
- Measure the current cable bundle, then add room for two future circuits
- Keep heavy power cables separated from data lines within the same profile
- Confirm the lid opens fully for later access without removing the base
Heat dissipation becomes a factor in a packed channel. Trunking grey near its stated fill percentage runs warmer, and that margin affects both performance and safety. The right profile anticipates the load beyond the moment of installation.
Installation Best Practices and Techniques
Essential Tools and Equipment for a Professional Finish
Getting a clean run of trunking grey down a passage wall demands patience more than muscle. I have watched installers rush the preparation and then fight every corner for hours. Take the time to measure, then measure again, before you cut, and always deburr the edges. A sharp hacksaw or a mitre block makes the difference between a joint that sits flush and one that gapes visibly. For the final fix, keep these items within reach:
- A spirit level at least 600 mm long
- A stud finder for solid concrete or brick
- Wall plugs and screws suited to the substrate
- A cable knife with a curved blade
Silicone sealant hides small imperfections where the trunking grey meets the ceiling, but it cannot rescue a poorly anchored base. Press each clip home until you hear it click. That sound is the small reward for careful work.
Measuring, Marking, and Cutting with Accuracy
The reward fades fast if the measurement was guesswork. I mark the centre line of the planned run on the wall first, then transfer that line to the back of the trunking grey with a straightedge. A chalk line works well on longer passages.
Cutting order matters:
1. Score the cut line with a sharp knife before sawing.
2. Hold a fine tooth hacksaw at a slight angle to reduce snagging.
3. Cut each length slightly proud of the mark.
4. Deburr the inside and outside edges with a file.
That extra millimetre is your allowance. Trim the trunking grey down to size rather than forcing a long section into a corner. Test each joint dry before you fix it; the wall may look straight, but the spirit level will tell you otherwise!
Fixing Methods for Different Wall and Ceiling Surfaces
Fixing trunking grey to masonry demands a different technique than fixing to hollow drywall. Masonry accepts hammer drills and wall plugs, while drywall needs toggle anchors to prevent tear-out. On timber ceilings, I prefer round-head screws driven through the back of the channel, and I drill pilot holes every time! Self-tapping screws risk splitting the grain. Fixing intervals change with the substrate:
- Masonry: every 400 mm
- Drywall: every 300 mm
- Timber: every 350 mm
Surface preparation decides whether the run sits flush or bows away from the substrate. Paint, dust, and loose plaster undermine adhesive pads and mechanical fixings alike. For uneven surfaces, space the trunking grey on packers to keep the line true. Silicone-based adhesive works on smooth painted surfaces, but mechanical fixings remain the reliable choice for ceilings, where the load pulls directly against the bond.
Joining Sections and Creating Internal and External Corners
Joining trunking grey sections cleanly demands a sharp blade and a steady hand. A mitre block helps you achieve precise 45 degree cuts for external corners. Internal corners work better with a square cut on one piece and a trimmed return on the other. I always dry fit the pieces before applying adhesive or driving screws.
For long runs, use the manufacturer’s couplers instead of overlapping sections. This keeps the internal profile smooth for pulling cables later. Two rules keep corners tidy:
- External corners: mitre both pieces at 45 degrees and check the lip alignment
- Internal corners: cut one piece square, then trim the back edge of the second piece to sit flush
Trunking grey sections joined with couplers and mitred corners create a continuous channel that professionals notice and clients appreciate.
Routing Around Obstacles, Ducts, and Fixtures
No wall runs perfectly flat. When trunking grey meets a downpipe, a distribution board, or a swollen conduit, the installer has to improvise. I keep a set of offset bends and pre-formed corners on site, because they solve most obstructions without cutting the base to pieces.
For deeper obstacles, I notch the trunking back and use a coupler to bridge the gap. A spirit level and a pencil mark beat guesswork every time! The channel stays tidy because I route it so the lid remains accessible, even when fixtures crowd the wall.
- Downpipes require a spacer block to hold the channel clear
- Distribution boards often need a relief notch cut into the base
- Swollen conduit runs can be bridged with a shallow offset bend
The trick is to keep the lid line continuous, so the trunking still opens fully where the obstacle passes.
Ensuring Compliance with Wiring Regulations and Safety Codes
Over 70% of electrical noncompliance findings trace back to poor installation technique rather than faulty components. In South Africa, SANS 10142 sets the baseline, and I treat it as the floor, not the ceiling. When fixing trunking grey, I first verify the wall substrate and select anchors that match the load. A cavity wall needs different fixings than a solid brick face, and the regulation table spells this out clearly.
I also pay attention to cable support within the channel. Loose conductors shift during thermal cycling, which stresses terminations. Using trunking grey with the correct internal radius prevents sharp edges from chafing insulation. Every joint gets a coupler, never a butt splice, because continuity of the earth path matters.
- Confirm the IP rating before installing in damp areas
- Measure the fixing distance according to the trunking width
- Test insulation resistance after every section is closed
Finally, I label each circuit at both ends. This small step makes future maintenance safer and keeps the inspector satisfied. The regulations exist to protect people, and my process follows them without exception.
Maintenance, Durability, and Long-Term Performance
Cleaning and Care Guidelines for Grey Trunking
Grey trunking in a Johannesburg factory has survived a decade of dust and heat with no visible fading. I have inspected installations where the only damage came from neglect, not the material itself. PVC remains tough, steel resists rust when scratched, and aluminium handles coastal salt air well.
Cleaning is straightforward. A damp cloth with mild detergent removes grime without harming the finish. Abrasive pads create micro-scratches that trap dirt. Long-term performance improves when seals and joints stay intact through seasonal shifts.
Durability depends on the environment. In humid Durban homes, condensation can seep into poorly fitted sections. Properly maintained trunking grey keeps its structural integrity for twenty years or more, and this version of trunking grey outperforms painted alternatives in high-traffic areas.
Impact Resistance and Mechanical Strength
Physical abuse is the real test. A dropped ladder or a bumped trolley will shatter flimsy alternatives, but trunking grey holds its line. The PVC compound absorbs low grade impacts without cracking, while steel versions shrug off accidental knocks that would dent painted options. Aluminium offers a middle ground, bending slightly instead of fracturing.
Mechanical strength shows up in daily use. Screws bite firmly, lids snap back after repeated access, and corners stay square under load. The material does not creep or warp near hot machinery.
This resilience lowers long term costs. You replace less, repair rarely, and trust the system during inspections.
resists the normal punishment of factory floors and busy corridors. That is why it remains the standard for demanding sites.
UV Stability, Colour Fading, and Weathering
The South African sun is merciless on plastics! Cheaper conduits turn chalky within a season, but trunking grey holds its pigment for years. UV stabilisers in the PVC compound absorb the worst radiation, preventing brittle fractures from prolonged weathering.
Colour fading is gradual, not sudden. I have watched coastal installations where salt spray and intense radiation work together. The surface dulls slightly, but structural integrity remains. A damp cloth restores most of the tone.
Long term performance shows in repeated thermal cycling. Expansion and contraction stress every joint. Properly fitted trunking grey accommodates this without cracking. Quick checks help:
- Feel for chalky residue on the surface.
- Verify lid clips after heatwaves.
Reusability and Reconfiguration After Installation
The useful life of trunking grey does not end when a building changes. It follows the cables.
Maintenance stays simple. A damp cloth along the lid channels clears dust that beds into the clips. That dust is the main cause of stubborn covers.
Durability in trunking grey shows across decades. The PVC compound resists sagging through repeated thermal cycling. Steel variants hold rigidity with minimal surface attention.
Long term performance reveals itself during reconfiguration. Walls change, cable layouts shift, the trunking adapts. Remove the lid, lift the conductors, reposition the base. The same channels accept new runs without fresh holes.
- Release the lid clips along the full length.
- Slide out the existing cable bundle.
- Refit the base in the new location.
Every component survives this cycle many times. Contractors keep spare lengths because the system becomes an asset.
Troubleshooting Common Issues and Repairs
Maintaining trunking grey is mostly about keeping the clip channels clear. A soft brush beats a damp cloth for stubborn dust in the grooves. That dust is the main reason lids refuse to snap back. If a cover sticks, run a flat screwdriver along the seam to release tension.
Durability in trunking grey shows in the small things. Constant direct sun can make some plastics brittle, but quality PVC holds. For steel variants, watch for rust at cut ends. That rust spreads fast! A light sanding and metal primer stops it quickly.
Common repairs are straightforward. Loose base plates come from crumbling wall material around the fixing. Use a wall plug for hollow surfaces instead of new holes. Cracked lids happen most often, but they are cheap to swap.
- Press the clips inward to remove the lid.
- Measure the exact length.
- Cut the replacement.
- Snap it into place.
Cost Factors and Comparative Value
Budget-Friendly Options Without Compromising Quality
Trunking grey might seem like a minor line item, but the price gap between cheap and dependable options often surprises first time buyers. In South Africa, a low cost PVC product can save a few rand upfront, yet it may crack under load or lose its colour within months. I have seen installations fail because homeowners picked the lowest quote. Rather weigh replacement time and labour against the initial saving. A mid range trunking grey with proper impact resistance offers better comparative value over five years.
Consider these cost drivers:
- Thickness of the base and lid
- Halogen free material versus standard PVC
- Accessory compatibility and clip quality
Spending a little more on these factors reduces repair bills later. That is the real budget friendly option.
Price Differences Between Colours and Finishes
Trunking grey typically costs less than other colours for a simple reason: production volume. In South Africa, grey is the default shade for most PVC and steel trunking lines, so manufacturers run larger batches and pass the saving on. White trunking needs extra whitening agents, and custom colours require separate runs, pushing the price up.
Finish also shifts the price. A matte or textured surface costs a little more, but hides scuffs and fingerprints better than a glossy one. I have seen clients choose gloss for aesthetics, then regret it once the first cable pull leaves marks.
- Standard grey with a smooth finish: lowest upfront cost
- Matte or textured grey: slightly higher price, better durability
- Custom colours or white: premium pricing due to smaller batches
The price gap between a cheap trunking grey and a premium option often comes down to UV stabilisers and pigment quality. The cheaper product fades within months, while the pricier version holds its colour for years.
Brand Comparisons and Quality Variations
Brand comparisons in trunking grey often reveal that the price tag tells only half the story. A reputable local manufacturer may charge 20% more than a no-name import, but the difference shows up in wall thickness, impact strength, and colour retention. I have pulled cheap trunking grey out of a ceiling after two years because it had gone brittle and chalky.
Quality variations are visible if you know where to look:
- Check the edge finish for burrs that snag cables
- Press the wall to test flex without cracking
- Compare UV stabiliser levels on the spec sheet
Those checks separate a one-time installation from a recurring expense. Recognised brands offer better traceability and consistent production batches, which matters when you need to match trunking grey sections later.
Long-Term Value, Energy Efficiency, and Return on Investment
Cost factors for trunking grey rarely sit where buyers expect. The shelf price is the smallest line in the budget. Labour, cutting waste, and rework carry the real weight, and in South Africa the electrician’s hourly rate can double the initial purchase cost before the first cable is pulled.
Long-term value depends on choosing a profile that survives roof heat and rough handling. Replacing a cracked raceway after three years costs more in labour than the product itself, so return on investment has to include lifespan, not just rand per metre. Energy efficiency works indirectly: a correctly sized trunking grey leaves space for airflow around cables, which keeps resistance steady and delays insulation failure.
That combination, predictable thermal behaviour and fewer replacements, makes the upfront price worthwhile over the life of the installation.



0 Comments