Understanding Cable Conduit Fixings
Why Proper Securing Matters
When a cable conduit sighs itself loose from its anchorage, the safety of an entire installation weakens. Proper securing is non-negotiable, yet it remains overlooked. Trunking nails, small but resilient, serve as the backbone of conduit fixings. They hold cables firmly, preventing sagging or slack that invite damage.
Understanding why these fixings matter begins with recognising stress points: temperature shifts, vibration,and weather. In South Africa, installations endure extreme heat andre occasional thunderstorms. A conduitthat shifts can expose wires to moisture or pests. Therefore, choosing the right trunking nails ensures longevity. Consider these factors:
- adequate length for wall depth
- corrosion resistance
- ease of driving
Each element contributes to a secure anchor, maintaining alignment over years. Without such diligence, even premium conduits fail, leaving repairs costly.
Common Materials for Surface Raceways
Cable conduit fixings are where most installations quietly go wrong. The raceway itself rarely fails. The fixings fail first. In South Africa, the choice of surface raceway material determines how much punishment those fixings can endure.
PVC is the everyday option. Lightweight, affordable, and easy to cut, it dominates domestic installations. Steel is the tough alternative. It resists impacts and harsh environments, making it the go-to for industrial sites. Your fixing strategy changes with the substrate:
- Soft walls call for shorter trunking nails to avoid punching through.
- Hard masonry demands sturdier nails and pre-drilled pilot holes.
- Steel raceways need hardened nails to penetrate without bending.
Matching the fastener to the material prevents cracked lids and wobbly channels. Choosing the right trunking nails also saves you from the embarrassment of a conduit that detaches itself the moment you walk away.
Factors Influencing Fastener Choice
The choice of a fastener is a quiet pact with gravity. Beneath the surface, hidden forces test every anchor. For trunking nails, the substrate dictates the length and gauge. Masonry demands hardened steel. Drywall requires coarse threads. Moisture alters the equation entirely. Consider these factors before you strike:
- Wall material density
- Ambient humidity levels
- Expected load weight
- Thermal expansion cycles
Each variable whispers a warning. A nail too short fails silently. A nail too thick splits the raceway. The unspoken rule is simplicity: match the metal to the matrix. Concrete wants ribbed shanks. Timber accepts plain steel. In coastal regions, corrosion becomes the unseen predator. Choose zinc or stainless finishes. The fastener’s journey ends where the conduit begins. Let the wall teach you its secrets. Then select trunking nails that honor that knowledge.
Selecting the Appropriate Fastener for Your Project
Matching Nail Size to Conduit Depth
When the conduit runs deep, the choice of trunking nails becomes a matter of arithmetic, not guesswork. A fastener that is too short will grasp only the surface, leaving the raceway vulnerable to the slightest bump. One that is too long can pierce the back panel or interfere with the conductors nestled inside.
The rule is straightforward: select a nail whose length exceeds the depth of the conduit base by at least 10 millimeters. This ensures the shank penetrates the substrate with enough force to hold, without risking damage to the wiring channel. For installations involving heavy cabling or frequent foot traffic, err on the side of a thicker gauge, as the added diameter provides greater resistance to lateral pull.
– Measure the conduit’s wall thickness first
– Add the depth of the substrate material
– Always account for the head’s seating surface
When the masonry is hard, such as plaster over brick, the trunking nails must be paired with a pilot hole to prevent bending. Conversely, timber surfaces allow for direct driving, though soft woods may require a nail with a serrated shank for better grip. Matching the nail to the job is the difference between a raceway that lasts decades and one that fails within months, a calculation worth making correctly the first time.
Corrosion Resistance and Environmental Conditions
A single misjudged fastener can undo years of careful work in one humid season, yet many South African installers treat trunking nails as if they were all created equal. They are not. The coastal air of Durban, laden with salt, behaves nothing like the dry Highveld atmosphere of Johannesburg, and your fastener selection must acknowledge this reality or face the consequences.
The metals used in trunking nails determine their survival. Galvanised options offer a first line of defence, yet even they differ in coating thickness. For environments where moisture is a constant companion, such as breweries or coastal warehouses, stainless steel becomes the only sensible choice. Please do not convince yourself that a standard zinc finish will suffice merely because the price is appealing.
– Salt spray from marine environments accelerates corrosion rapidly
– Chemical vapours in industrial settings attack unprotected metals
– High humidity combined with temperature swings creates condensation
– Direct sunlight degrades certain protective coatings over time
The financial mathematics here are simple and brutal. A box of premium trunking nails costs marginally more than their inferior cousins, but replacing corroded fixtures involves labour, disruption, and potential damage to the cables they were meant to protect. I have witnessed entire installations compromised because someone chose economy over foresight, and the resulting rectification bill was substantial. The environment does not negotiate, and neither should your standards. Give your project the attention it deserves by selecting fasteners that treat their surroundings with caution.
Load-Bearing Considerations
Many installers underestimate the static load a filled trunking places on each fixing. A 100mm trunking packed with copper cable can pull several kilograms per metre. Multiply that across a long run, and the cumulative force on each fastener becomes substantial.
The substrate dictates the fastener’s holding power. Masonry anchors grip differently than timber fixings. Trunking nails driven into aerated concrete blocks behave notably worse than those set into solid brick or cured concrete.
Consider the forces at play:
– Shear load from the trunking’s weight pulling downward
– Pull-out resistance against flex and movement
– Torsional stress when the conduit twists during installation
Trunking nails rated for the substrate and the projected cable weight hold firm. Undersized fasteners work initially, then gradually fail under sustained load.
Compatibility with Different Wall Types
A wall reveals its character the moment you strike it. On one site, you have the unyielding certainty of a cured concrete slab. On another, the brittle resistance of a thin plasterboard or a budget hollow brick. I have watched installers hammer trunking nails into a lime-based mortar and then watched the fixing wobble free by lunchtime. That failure is not a nail problem; it is a discernment problem. The fastener must match the wall’s density, not just the conduit’s depth.
Take the common fibre cement board used on industrial walls. A standard smooth-shank trunking nail will graze the surface, while a threaded or barbed shank grips the fibre edge. Conversely, a heavy masonry nail in a pumice-filled block will rip the particle structure apart. The nail point needs to displace material, not shatter it.
Here is the compatibility quick chart:
– If the wall is poured concrete, use a hardened, diamond-pointed nail.
– If it is a hollow clay or gypsum board, use a nail with a compressed thread profile.
– If it is an unknown aggregate, pilot-drill a test hole first.
In the end, the trunking nails you have in your pouch should be chosen after you inspect the wall’s porosity. The trade demands a moment of humility at the wall.
Step-by-Step Installation Techniques
Pre-Drilling and Pilot Holes
Installing trunking nails without preparation is a gamble that often ends in bent fasteners and split plastic. The secret is pre-drilling pilot holes. This step eliminates the guesswork and ensures the nail enters the material with minimal resistance, preserving the integrity of both the trunking and the mounting surface.
First, always mark your drill bit. The hole depth must match the nail length. This simple action prevents you from drilling too deep into a wall or too shallow, which leaves the fastener proud. Use a drill bit that is slightly smaller than the nail shank. For instance, a 3mm nail needs a bit no larger than 2.5mm. This allows the ribs of the nail to bite securely without creating a cavity that is too loose.
Here is the quick process for achieving a perfect fit:
– Mark the fixing point through the trunking base.
– Swap your drill bit for the correct sized masonry bit.
– Set the depth stop to match the nail length.
– Drill the pilot hole and clear the dust.
Once you drive the trunking nails home, the hold will feel immediate. The pre-drilled hole directs the nail perfectly, preventing it from wandering and causing the trunking to stress or crack. It turns a frustrating job into a controlled, clean install.
Positioning and Spacing Guidelines
The quiet battle between time and durability is often won in inches. Positioning trunking nails is not about brute force, but about reading the landscape of the wall and the trajectory of the raceway. Begin your layout by mapping the entire run before a single fastener touches the surface. Mark the fixing points with a pencil, ensuring you start the sequence 50 millimetres from each end of the trunking section. This edges the first nail where the material has the most rigidity, preventing the lip from flaring outwards during the drive.
For vertical drops, the rule is to space your trunking nails every 400 to 600 millimetres. Horizontal runs demand a stricter pattern, usually every 300 millimetres, because gravity and cable weight place a constant shear load on the upper edge. If the run bends around a corner, place a nail within 100 millimetres of the bend on both sides. This anchors the stress point and stops the trunking from bowing away from the wall over time.
A common mistake is to nail directly into the voids between studs in drywall. When you hit a cavity, the nail has nothing to grip, and the hold is a facade. Instead, adjust your spacing to coincide with the framework behind the board. For masonry, the cadence changes. You have more forgiveness, but you still need to measure. Consider the environment. In a garage or a coastal property where humidity is a relentless presence, shrink the spacing down to 250 millimetres. The denser the anchorage, the less chance the plastic has to flex and fatigue.
Here is a quick checklist for the field:
1. Measure the run and mark all points before you drill.
2. Initiate the fix 50 millimetres from the end of each trunking length.
3. Maintain a 400 millimetre pitch on vertical runs.
4. Reduce the pitch to 300 millimetres on horizontal runs.
5. Add supplementary nails near corners and joints.
The precision of this layout is what separates a tidy installation from one that groans under its own load. When you align the trunking nails with the structural rhythms of the wall, you create a fixing that feels solid under the palm. The raceway should never flex when you press against it. That tactile firmness is the signature of spacing done right. The capping clips might hold the lid, but the trunking nails hold the story together.
Using a Nail Punch or Hammer
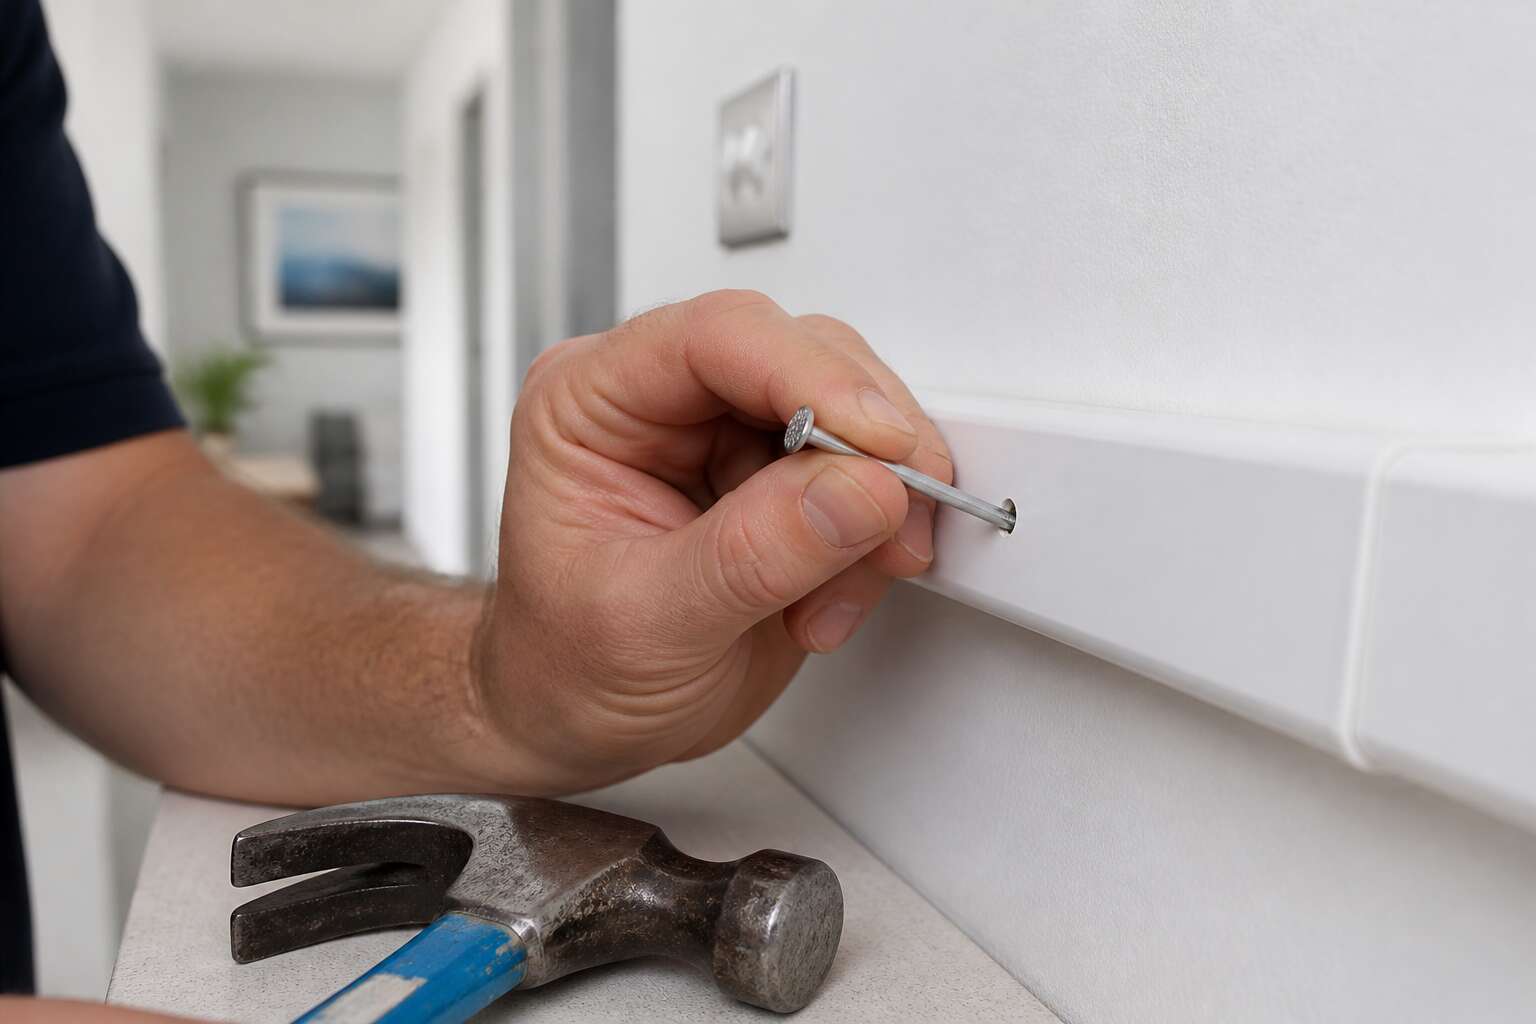
There is a particular satisfaction in driving trunking nails with a proper nail punch, especially when you avoid skinned knuckles and crooked fasteners. The technique demands a steady hand and a patient wrist. Position the punch squarely on the nail head, angled slightly toward the wall’s face. One decisive tap seats the nail. Two more taps set it flush.
A hammer alone can work, but it requires a different touch. Use the hammer’s cheek, not the full face, to avoid bending the nail. Support the trunking lip with your off hand while you strike. The material should never distort.
- Hold the punch at 90 degrees to the nail head
- Drive in short, controlled strikes
- Check for flush seating every few fixings
For trunking nails that resist, stop and reassess. Forcing a stubborn nail bends the fastener and damages the plastic.
Avoiding Damage to the Conduit
Every misplaced strike can split a PVC conduit like a dry twig. You need a method that respects the material. Begin by marking the fixing points, then align the nail’s tip exactly where the clip meets the trunking’s inner channel. That angle is everything. A shallow entry point protects the conduit’s spine. Work in sequence, moving from the centre outward.
Follow these steps to avoid damage:
- Insert the nail by hand until it grips the base.
- Tap gently, letting the hammer’s weight do the work.
- Stop the moment the head touches the plastic.
Resist the urge to overdrive. A proud nail is less harmful than a crushed channel. With trunking nails, patience is your best safety tool. Check each fixing for signs of stress before moving on to the next span.
Finishing and Concealment
“Thirty percent of surface raceway failures trace back to a single loose fixing,” one Cape Town electrician told me. I have watched trunking nails pull free from hollow walls within months. The installation sequence changes that. Start at the end of the run, not the middle. The right trunking nails seat cleanly every time.
Thread each nail through its clip. Brace the channel against the wall. Tap the head until it seats. Move to the next fixing point. Steady rhythm, no force. The conduit stays straight and the clips hold firm.
Finishing hides all the work. Countersink the heads below the surface. Use these options for concealment:
- White filler for standard PVC trunking.
- Grey epoxy for metallic raceways.
- Flexible sealant where vibration may occur.
Sand each patch flat and the fixing points disappear. A smooth, continuous line reads as professional work. That is the final measure of good installation.
Alternative and Complementary Fixing Methods
Adhesive Solutions for Light-Duty Applications
When securing lightweight conduit in low-vibration, indoor settings, a robust adhesive offers a clean, drill-free alternative to trunking nails. This method excels on difficult surfaces like tile, glass, or painted metal where impact fasteners risk cracking or shattering the substrate. I have found that a high-quality construction adhesive, applied in a zigzag bead along the channel’s base, provides immediate grab strength and eliminates the need for pilot holes.
For lighter plastic channels, heavy-duty double-sided foam tape can work in a pinch, but it requires perfectly clean, dry surfaces to bond effectively.
However, a strong adhesive is particularly suited for specific scenarios:
– Adding a single, short length of trunking to a smooth wall.
– Securing lids or accessories where nails would be intrusive.
– Working with heat-sensitive materials that cannot withstand hammering.
Remember, this method is a complement, not a replacement. For long runs or areas prone to physical impact, traditional trunking nails remain the superior choice for lasting durability and structural integrity.
Screw and Plug Options
When trunking nails lose their grip in masonry or hollow block, screw and plug combinations provide a mechanical hold that impact fasteners simply cannot achieve. A wall plug expands against the substrate while the screw delivers substantial pull-out resistance. This approach suits heavier steel trunking or installations where constant vibration would loosen a nail over time.
For hollow walls, cavity fixings spread the load across a wider surface area than any nail shank. The installation takes longer, but the holding power justifies the extra effort. I have seen screw fixings outperform trunking nails entirely, particularly in older South African buildings where plaster has grown brittle and fragile.
- Plastic plugs for light masonry, nylon for heavier loads
- Screw gauge matched to the trunking lug aperture
- Expansion anchors for hollow or cavity walls
Screw heads sit flush within purpose-made trunking lugs, allowing the lid to close cleanly. Unlike trunking nails, screws can be removed without damaging the channel, which simplifies future modifications or cable additions.
Clip Systems for Easy Removal
The spectacle of a trunking lid refusing to seat properly is a familiar ghost in any electrician’s day. When the need for future access looms, the permanence of a hammered fixing becomes a curse. Clip systems offer a reprieve, a method of securing the channel without the finality of a driven shank. These mechanisms grip the base with a deliberate but yielding force, allowing a technician to release the conduit with a simple tool, leaving the channel undamaged and ready for its next incarnation. This is a clean departure from the violent rupture of a claw bar prying out a stubborn nail.
For installations in commercial settings where cable changes are a seasonal certainty, this approach is a quiet workhorse. The initial outlay of effort differs, yet the long-term benefit is substantial. You avoid the desecration of the wall fabric that repeated nail extraction causes. Consider the specific benefits:
– Rapid removal and reattachment of the conduit path.
– No deformation of the trunking channel itself.
– Reusability across multiple installation cycles.
The clip’s hold is often sufficient for lighter cable loads, and the release mechanism provides a novel grace missing from traditional impact methods. It is a thoughtful alternative for those who value the integrity of the system over the brute simplicity of a nail, a strategy that whispers of foresight rather than haste.
When to Combine Methods
When a single fixing method gets too smug, it is time to introduce it to a colleague. Combining trunking nails with clip systems might sound like overkill, but the hybrid approach often rescues an installation from mediocrity. Use nails at the channel ends for rigid anchoring, then let clips handle the middle where thermal movement or future access demands flexibility. Alternatively, pair adhesive pads with a single nail to hold the base steady while the glue cures. The key is knowing which method carries the load and which merely keeps the peace. A few sensible unions:
– Nails for structural corners, clips for long straight runs.
– Screws at the start, adhesive along the rest.
– Clips over a nailed base for heavy cables.
Select combinations that respect the wall fabric and the cable weight. The right blend saves time later.
Common Mistakes and Troubleshooting
Overdriving and Its Consequences
I have pulled trunking nails driven three millimetres too deep, and each lost nearly half its grip on the substrate. Overdriving is the quiet failure most installers discover only after the conduit begins to shift.
The nail head buries itself into the PVC, compressing the channel walls. That deformation pinches the cables inside, creating a hotspot that can compromise insulation over time. More immediately, the conduit loses its rigid support and starts to flex with every temperature change.
Signs of overdriving include:
- A visible depression in the trunking surface
- Conduit that rattles when tapped
- Nail heads punched completely through the base
When trunking nails are overdriven, the repair is never simple. Pulling the offending nail reveals a hollow where the base has crumbled. The crushed section needs to be cut out entirely. The extra force, meant to secure the conduit more firmly, achieves the opposite.
Misaligned Fastener Placement
Misaligned fasteners present their own brand of trouble. A trunking nail that enters at an angle skims the substrate and leaves the conduit held by a fraction of its true grip. The deflection shows itself as a subtle twist along the line, making the installation look crooked and feel unsteady.
The fix demands honesty about the wall. Knots in timber and voids in masonry deflect trunking nails without warning. Widen the hole, realign the conduit, and drive the next fastener squarely. If the first attempt leaves a wound, patch it before re-fastening. A second misplaced hit never redeems the first.
Measure twice. Trust the vertical line. Stop at the first sign of a skip, reassess, and start again.
Dealing with Hollow Walls
The gap between the conduit and a hollow wall is a silent sabotage. Drywall gives nothing but air behind its face, so drive too hard and the trunking nails collapse the void. The installation becomes a loose sketch of the plan, capable of slipping under vibration or load.
Hollow walls demand a different touch. Send the nail in and the plaster resists, a sound that tells you everything yet asks for patience. A single test push with a screwdriver reveals the cavity. Then the deliberate shift to a toggle bolt or a heavy-duty plug for interior walls.
If stubbornness wins and you use standard trunking nails anyway, the wall hides its damage until the first cable tug exposes it. The fix list is short:
1. The nail pulls out from under the head.
2. The plaster craters, leaving a flower shaped wound.
3. The trunking follows the wall like a tired line.
Treat them all as signs. A hollow wall is not a frustration, it is a system. And with a system, you work with what it offers. I treat flat as a warning. The moment the skin of the wall gives and the trunking nails fail, I stop and reach for the right anchor. The whole job turns honest again.
Removing and Replacing Damaged Pins
Pulling a trunking nail out straight when it is bent usually worsens the damage. The head snaps, and the shaft stays embedded. Locking pliers with a slow twisting motion free the pin without tearing the plaster. Pull along the hole’s axis, never sideways. When trunking nails break flush with the surface, drill a shallow pilot hole and drive a screw extractor in anticlockwise.
Once the remnant is free, check the conduit for deformation. Then treat the hole as a fresh installation. Do not reuse a widened hole with the same size pin.
Common mistakes to troubleshoot:
- Hammering the damaged pin deeper instead of extracting it.
- Switching to a thicker replacement that cracks the original hole.
- Forgetting to clear dust and debris from the bore before inserting a new pin.
For stubborn cases, a nail punch from a 45 degree angle gives better purchase. Replacing trunking nails properly keeps the raceway plane and load capacity consistent.


0 Comments