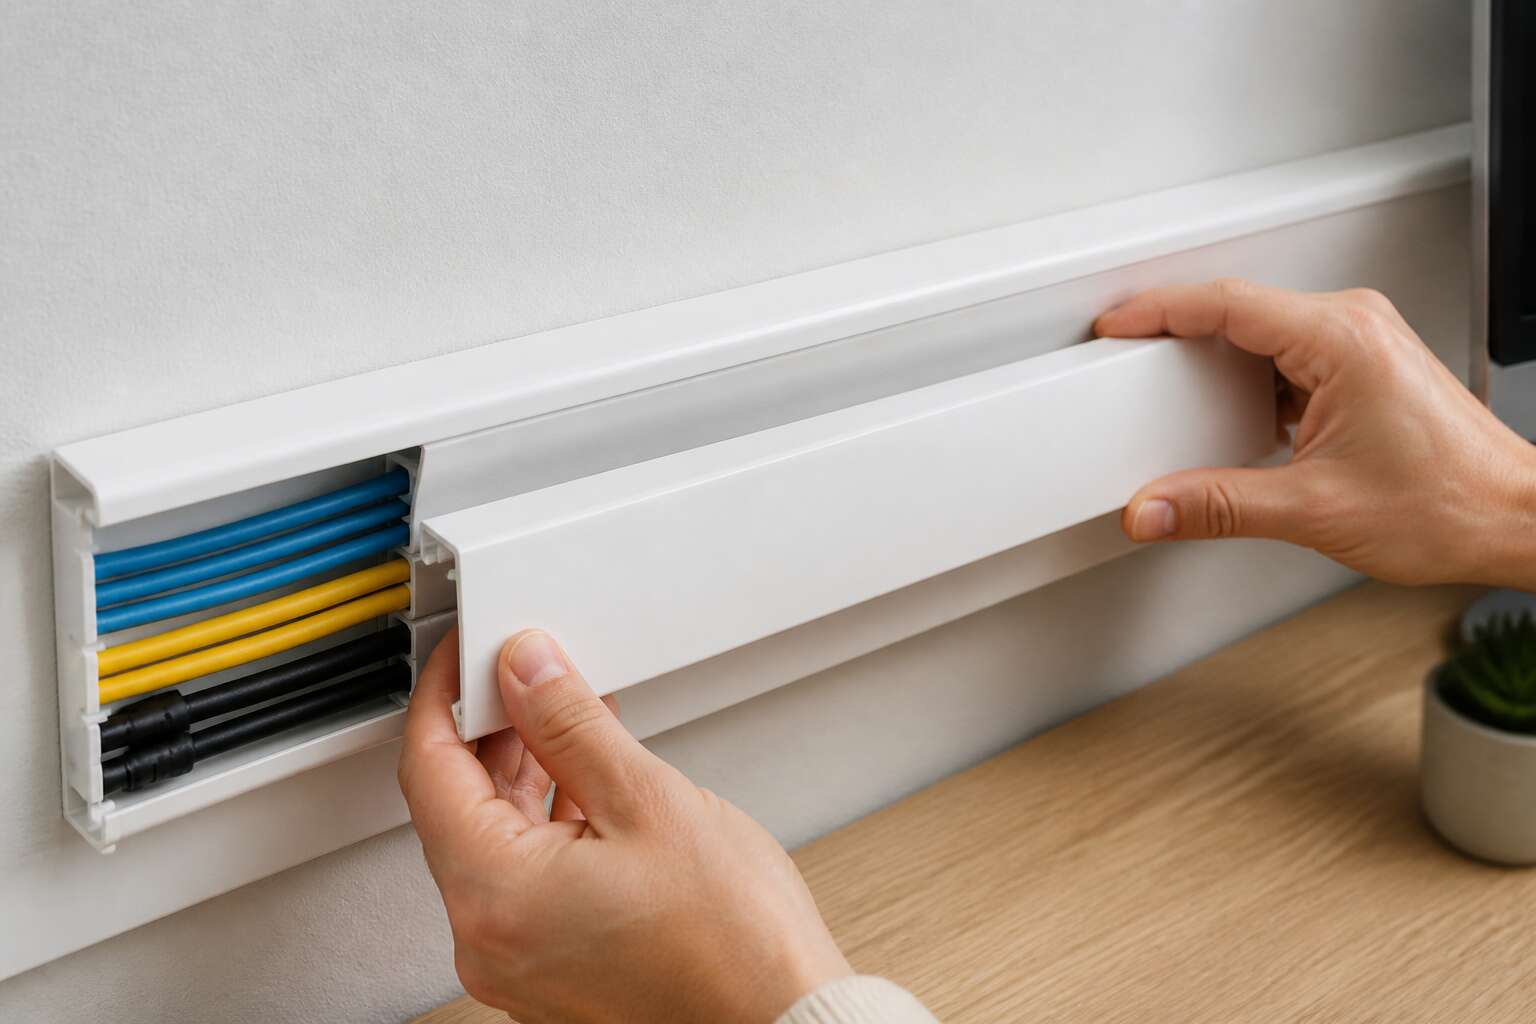
Understanding Cable Trunking Systems
What is Cable Trunking?
According to a 2023 industry review, nearly 40% of electrical installation callbacks in South Africa involve damaged cables. Many of those faults trace back to inadequate containment. Cable trunking systems exist to solve that problem, offering a structured pathway that keeps power and data lines protected, organised, and serviceable.
The trunking lid is the finishing element, the part that seals the route against dust, moisture, and impact. In my experience, a lid that clicks securely yet opens cleanly can mean the difference between a five minute service call and a full wall repair.
- Compatible profiles for different channel widths
- Impact resistant materials for high traffic areas
- Access points spaced for easy cable pulling
Not every trunking lid fits every base channel. Matching the lid to the specific trunking profile is essential, otherwise the system loses its protective function entirely.
Components of a Trunking System
The most vulnerable part of a trunking system is the lid. The base channel simply carries the cables and fixes to the wall. Dividers keep power circuits away from data lines. Couplers extend the run, and end caps terminate it. The trunking lid is what closes the containment, and it absorbs the most daily abuse.
- A base channel to anchor and support the cables.
- Dividers to separate high voltage from data.
- Couplers and end caps to extend and finish the route.
- A trunking lid to seal and protect the assembly.
I have opened runs where the lid had popped loose at every coupler joint! Once that happens, dust and moisture enter the channel, and the protection the whole system promises disappears.
Benefits of Using Trunking
In a country where load shedding tests every electrical installation, the trunking lid carries a steady responsibility. It absorbs impacts, blocks dust, and keeps moisture out of the channel. That moulded plastic strip is the difference between a contained system and a failing one!
The benefits of using trunking become obvious when you consider replacement costs. A sealed channel protects data cables from signal degradation, keeps power lines separate, and reduces the need for frequent maintenance. For South African installers, a dependable trunking lid means fewer callbacks and longer-lasting installations.
Trunking protects against:
- Dust that weakens network performance
- Water ingress from leaks or cleaning
- Accidental damage in busy areas
When the lid stays seated, the whole installation performs as designed.
Common Applications
Under every neat wall socket and data point in a Johannesburg office, the trunking lid stands guard. I have seen installations in factories, schools, and newly built townhouses, and the difference always comes down to the same component. Cable trunking systems channel power and data through spaces where bare wiring would invite chaos. Common applications include:
- Office partitions where desks shift and cables must follow
- Retail counters that need both till lines and network connections
- Industrial floors where vibration and foot traffic test every fitting
Each setting demands a lid that stays seated under stress. In coastal areas, salt air attacks exposed channels. In highveld winters, dryness makes plastic brittle. Understanding these applications helps installers choose the right trunking lid for every environment.
Why the Cover Matters
A power surge does not respect neat cable runs, nor does it ask permission before finding the weakest point. The trunking lid is that weakest point in many Johannesburg installations. I have seen pristine channels fail because the cover was an afterthought, chosen for price rather than performance. The lid bears the same fire rating, mechanical strength, and environmental resistance as the channel, yet engineers treat it as a clip-on extra.
The system only works when the lid stays seated under load. A loose cover allows humidity to reach copper, accelerates thermal degradation, and shortens the service life of every cable inside. Coastal air in Durban, highveld dryness in Pretoria, each climate attacks a different flaw in the seal.
A properly speced trunking lid achieves three things:
- Preserves the ingress protection rating against dust and water.
- Maintains structural continuity when walls shift or floors flex.
- Prevents accidental contact with live conductors during maintenance.
The cover deserves the same scrutiny as the channel. Its failure becomes your failure.
Types of Covers and Their Features
Material Options
A trunking lid is a quiet negotiator. It forgives minor misalignments, tolerates temperature swings, and still promises to sit flush for the life of the installation. When you select a cover, you are not just choosing a piece of plastic or metal; you are choosing a threshold for maintenance access and a barrier against dust ingress.
Material choice dictates the psychological security of the installation. PVC is the default for domestic and light commercial runs because it is forgiving, lightweight, and easy to cut. However, in spaces where machinery hums and vibrations run through the walls, PVC can feel flimsy. Steel escalates the physical presence. It offers a rigidity that suggests permanence, often used in industrial settings where the trunking lid protects power feeds that cannot afford downtime. Aluminium offers a middle path. It is lighter than steel but harder than PVC, and it resists corrosion in coastal climates, a real consideration for installations near the ocean.
The manufacturing technique also shapes how the lid behaves over time. A simple clipped lid relies on the polymers’ memory to hold it in place. A screwed version provides a tangible sense of closure, though it slows down access. Fire safety rating is another variable. The toxicity of the material, not just its flame resistance, dictates safety in a fire escape route. Each material and profile presents a specific cost and performance trade off, and the environment dictates which attributes matter most. The quiet resilience of the lid often determines whether a system feels like a fragile channel or a fortress. Choose based on the tactile and thermal demands of the site, and the lid will remain a silent asset for decades.
Design Variations
No one ever compliments a trunking lid, but everyone notices when it fails. Trunking lids come in several personality types. Some clip on with a click, others require a screwdriver. The choice affects more than installation speed. In facilities where tampering is a concern, a screw fixed lid offers security. Where maintenance teams work frequently, a hinged lid allows quick swings without fumbling.
The profile shifts usability. A flat, flush lid prevents snags from trolleys and brooms. A radiused top sheds water and dust more readily, which matters in outdoor runs. Even the edge detail, square or tapered, affects how easily the lid sits.
Here is a quick feature comparison!
- Clip on: fastest to fit
- Screw down: resists vibration
- Hinged: balances access and security
For South Africa, the trunking lid must resist UV degradation. Select a trunking lid design that matches the environment. The right variation will make every future visit a short one.
Sizing and Dimensions
Two millimetres of thermal expansion can jam a trunking lid. That is why I size covers for the local climate, not the catalogue. South African floors bake under high UV, and PVC responds.
Types of covers solve specific problems. A gasketed lid seals against dust. A recessed lid protects edges from trolley wheels. A split lid allows access to one cable zone. A locking lid deters casual interference.
Sizing requires precision. Measure the channel’s internal width, never the outer profile. A trunking lid that overhangs by 5 millimetres will snag on brooms. Standard sections run 2 metres or 3 metres. Order 5% extra for cutting waste!
Key checks for sizing:
- Internal width
- Lid profile depth
- Expansion gap at joints
Test the fit on a hot afternoon.
Accessories and Fasteners
A trunking lid only performs when its fasteners suit the environment. Clip-on covers offer speed during installation. Screw-down lids provide a secure hold under constant vibration. Accessories like foam inserts and cable retainers add function. Common fasteners include:
- Spring clips for tool-free removal
- Torsion latches for frequent access
- Cam locks for tamper resistance
Select fasteners compatible with the cover material. I have seen brass screws outlast the entire system in coastal factories. Plastic clips work for lightweight profiles. Foam seals on the inside edge block moisture and debris. A properly matched accessory set turns a simple cover into a dependable guard for years.
Fire-Rated Covers
Fire moves faster than most people think. A polymer trunking lid can soften and warp within minutes of exposure. When the installation runs through an escape route or a high occupancy building, that becomes a life safety issue. Fire rated covers are designed for this specific threat. They carry an SANS or EN classification that states how long the assembly will resist flame and heat. We treat these ratings with respect. They are not a marketing sticker. They are a tested boundary.
The value of a fire rated trunking lid lies in its containment. A standard cover may melt and expose the conductors. That can create a secondary fault during the very emergency that triggered the fire. The rated system holds its shape. It smothers the flames inside the channel. It cuts off the oxygen that would otherwise feed the cable. That delay, even if it is only 30 minutes, can be the difference between a contained incident and a total building loss.
– A lid with a 90 minute rating for high risk zones.
– A clear polycarbonate version for critical inspection points.
– A gasketed cover that resists both fire and water ingress during suppression.
We see fire rated trunking lid specifications most often in hospitals, schools and industrial plants around Gauteng and the Western Cape. The material formulation includes special additives that suppress combustion. These lids cost more upfront. The insurance requirement and the legal duty of the installer make the expense necessary. Choose the rating based on the cable load and the building egress plan. Never guess the class. Check the certificate and match the profile to the manufacturer’s data sheet.
Specialized Covers for Outdoor Use
A cable trunking lid specified for indoor duty will not survive a South African summer. Our UV index is brutal, and the heat inside a roof cavity can exceed 60 degrees Celsius. That kind of exposure makes cheap PVC brittle. You will see cracks within eighteen months, and then you have exposed conductors and a trip hazard. The outdoor environment demands a different material profile. It requires a lid that resists ultraviolet degradation, water ingress, and the temperature swings that come with Highveld thunderstorms.
The right outdoor trunking lid is usually manufactured from a modified PVC or a UV-stabilised polycarbonate. It must also have a secure locking mechanism. A simple friction fit works indoors. Outside, wind and thermal movement will pop it loose. We recommend a cover with a positive clip or a screw-down action.
When choosing a lid for external use, consider these points:
1. The lid must carry an IP rating for water and dust ingress.
2. Check for UV stabilisation in the material additive package.
3. Confirm the profile matches the channel base exactly, with no exposed gaskets.
4. Look for a solid colour that hides dirt and resists algae growth.
The outdoor specification also changes the gasket material. Standard rubber dries out in the sun. A silicone gasket holds its flexibility and will keep moisture out of the junction box. Theft is another factor. Copper thieves will pry off a loose cover to get at the cables inside. A lid with a hardened surface and a tamper-resistant fastener discourages that behaviour. The exterior installation is not a place for shortcuts. A failed outdoor cover exposes the wiring to corrosion and creates a shock risk for maintenance staff.
Installation Guidelines
Pre-Installation Planning
Around 30% of cable management issues in South African commercial builds trace back to hasty planning before a single component is mounted. The story of a successful installation, therefore, begins long before the first screw touches the wall. It starts with a careful audit of the environment where the trunking will live. You are not just mapping a route for cables; you are anticipating the daily traffic, the potential for moisture, and the specific movements of the people who share that space. This foresight is what separates a seamless infrastructure from a recurring maintenance headache.
Pre-installation planning requires a clear-eyed assessment of the physical path. Measure the entire run, but also account for corners, changes in floor level, and the presence of existing conduits or pipes. A simple sketch of the intended path, marked with all junction points, serves as your blueprint. This is the moment to consider access points for future maintenance, ensuring that the trunking lid can be removed without dismantling entire sections of the run.
– Confirm the wall or floor material to select the correct fixing method and anchors.
– Verify that the route does not interfere with electrical outlets, switches, or data ports.
– Calculate the total cable volume to ensure the chosen trunking capacity is sufficient, leaving room for the lid to close without pinching wires.
Once the route is confirmed, shift your focus to the substrate. A surface that is uneven, damp, or covered in loose paint will compromise the integrity of the installation. The adhesive or screw fixings rely on a clean, stable base to hold firm over time. In coastal areas of South Africa, where humidity is a constant factor, this preparation is even more critical. Silicone sealant applied at this stage, before the trunking is fixed, can provide an extra layer of defense against moisture creeping behind the covers.
Finally, think about the sequence of assembly. It is rarely efficient to fix the entire base channel to the wall before laying a single cable. Instead, work in manageable sections, pulling the cable through as you go. This approach keeps the wires manageable and reduces the tension on the trunking lid when it is time to snap it into place. Careful attention to the alignment of the lid, ensuring it clicks evenly along its length, prevents gaps that compromise both aesthetics and safety. The planning phase, though often rushed, is the true guardian of the installation’s longevity.
Cutting and Fitting Techniques
A careless cut can warp the trunking lid and mar the whole run. A fine toothed hacksaw or a purpose built shear produces a clean edge, while a dull blade leaves a burr that snags cables. Measure twice, then score the line with a utility knife before cutting.
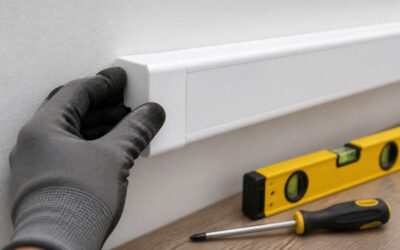
When you approach a corner, cut the base channel at a 45 degree angle for a neat mitre. The trunking lid should overlap slightly to hide any gap. Fit the lid by pressing from one end to the other.
For a professional finish, follow these steps:
- Mark the cutting line on all sides of the trunking.
- Cut with the profile facing upward.
- Deburr the edges with a file.
- Test fit the trunking lid before fixing the base.
A dry fit saves time later! Sanding the cut edges improves the seal in dusty South African environments.
Securing the Covers Properly
That satisfying click when a trunking lid seats into its channel means nothing if the cover rattles free. In South African climates, heat and dust work against loose components. A half secured cover can warp or permit contaminants into the run. Fix the base properly before the lid goes on.
Press the lid along its entire length, applying even pressure from one end to the other. Listen for the double click that signals both edges engaged. For long horizontal runs, add clips every 300 mm. Vertical runs demand closer attention, because gravity works against you!
- Self tapping screws for metal trunking
- Snap on clips for PVC profiles
- Adhesive backed bases for light duty runs
Test each segment after securing. A cover that lifts with gentle pressure needs immediate adjustment. Proper securing also means checking that no gap remains where the trunking lid meets the base, as even a hairline opening causes problems.
Integration with Wiring
It is a small comfort that the most expensive component of a cabling system is often the one that receives the least consideration during installation. The trunking lid, however, is the only part of the run you will interact with for years to come. A cover that is glued down or a base that is crushed by overtightened screws will frustrate every subsequent maintenance visit.
Professional installers treat the lid as a service portal, not a permanent seal. When running data or low voltage cabling, consider the path of the draw wire before you clip the base down. The real art lies in orchestrating the sequence. Terminate your cables and dress the conductors neatly before you even think about seating the cover. If you are working with stiff power cables, allow a little slack at the corners.
The unit of access is the segment. A run that is thirty meters long is not one lid, it is dozens of smaller considerations.
– Avoid creating a bend tighter than the cable’s minimum radius where the run turns a corner.
– Use a junction box at every branch, rather than trying to bend the cable around the lid.
– Leave a service loop at each end of the run for future retermination.
Planning for the eventual removal of the cover during commissioning will save you a knife blade and a chipped edge later. If you are expecting to add a circuit next year, install a larger base than necessary today. The trunking lid will still fit, but the internal capacity will accommodate your future ambition without the need to dismantle the entire wall. Do not forget that the lid itself is a physical barrier to dust and debris, a boon in a building site environment, but it is also a marker for any technician who needs to know where the power is.
Inspection and Testing
According to the SANS 10142-1 wiring standard, a trunking lid that seats poorly means a return visit. Inspection begins before the cover snaps shut. Run your hand along the joint. A gap is a future dust problem and a safety hazard.
Testing is not a formality. Check earth continuity across the trunking run, especially where sections join. Use a continuity tester. Confirm that the trunking lid remains removable after testing, because paint or foam can weld it shut.
- Verify lid alignment at every joint.
- Check that cable fill does not exceed 40% of the internal area.
- Test lid retention with a firm pull after installation.
Recorded readings from the continuity test become your baseline. A lid that cannot be pulled off by hand will cause delays later.
Maintenance and Safety
Regular Inspection Practices
In the half light of an industrial corridor, the trunking lid often goes unnoticed until it fails. South African climates, from coastal humidity to Highveld dust, impose their own quiet corrosion on these covers. A lid that once clicked shut can loosen, exposing cables to moisture or curious rodents.
- Check lid edges for warping or UV embrittlement every quarter.
- Verify that fasteners remain snug, not overtightened.
- Inspect gaskets on outdoor runs before summer storms arrive.
Safety begins with the simple act of looking. Before any inspection, switch off the circuit. The cost of a minute is nothing against the price of an arc flash. Let this become a ritual, not a chore.
Cleaning and Upkeep
A trunking lid caked in Highveld dust becomes a camouflage for cracks. Cleaning is the first line of upkeep, and it is cheaper than a rewiring job. I use a soft cloth, lukewarm water, and dish soap. This removes the abrasive grit that grinds into the hinges. Skip the pressure washer; that forces moisture past the seals. For coastal runs, a plain water rinse handles salt crystals.
- Wipe from the hinge side outward so debris does not collect.
- Dry the exterior completely before it sits in the afternoon sun.
- Apply a thin layer of dry PTFE lubricant to the latch mechanism, never oil.
- Wipe away any excess lubricant to avoid attracting dust.
Once the trunking lid is clean, inspect the colour fade. A chalky sheen means UV wear is advancing. A light silicone wipe restores some pliability, but don’t expect miracles. Upkeep is about consistency, not heroics.
Replacing Damaged Covers
Approximately 80% of electrical faults in exposed installations trace back to compromised covers. A cracked trunking lid isn’t a cosmetic blemish; it is a standing invitation for dust, moisture, and curious fingers to meet live conductors. Delaying replacement turns a R50 part into a R5,000 rewiring bill.
When you spot damage, act with urgency. A broken clip or a hairline fracture compromises the entire run’s integrity. Swapping a lid is a five-minute job that requires no special tools.
– Never use tape to secure a shattered section. It hides the problem.
– Always match the new trunking lid to the original profile, mixing brands rarely works.
– Check the gasket condition on outdoor units before fitting the replacement.
Safety starts with your own hands. Isolate the circuit before you pry off the old cover. A screwdriver slipped against a live busbar is a memorable lesson, and not the good kind. Treat every damaged trunking lid as a defect that worsens with each passing hour. The cover is the only barrier between your wiring and the world. Keep that barrier whole.
Safety Precautions
It is an unsettling truth that fewer than half of trunking lid failures announce themselves. The rest wait, silent and unseen, until a switch clicks and the lights stay off. A cover that survived last winter’s storms may have already surrendered to an internal corrosion you cannot see from the outside. The battles of breakage begin invisibly, a gradual wearing of clips and thinning of plastic walls.
Maintenance means treating every trunking lid as a suspect, not a fixture. This is the part of the process that separates a disciplined installation from a random metal chase. A quick weekly visual scan takes seconds, but it must happen with the same consistency as checking a till at close of business. The moment you stop looking at the covers is the moment a cover fails you.
Certain signals demand immediate attention. An oily residue near the chase points to heat stress. A faint buzzing noise from under the closed cover means the conductors are working too hard. Ignore these symptoms and you are not maintaining a system, you are betting against physics.
Before touching anything, run this checklist.
– Use a voltage tester on the trunking lid before opening. The cover is not a shield, it is a lid.
– Inspect the fixing screws for rust before loosening them. A snapped screw is a trapped cover.
– Look for signs of water ingress inside the channel even if the cover looks perfectly sealed.
– Remove the cover slowly and support its length. A warped lid can spring from the track.
The cover protects the circuit, but the mistake is thinking the circuit is dormant once the switch is off. Capacitors hold charge. Neutral conductors carry current even with the breaker down. When you pry that trunking lid off, your fingers are working inside a live environment. A healthy respect for that energy is quieter and more effective than any tool. Replace the lid only when you have confirmed the area is fully safe, and never assume a closed cover means a dead circuit. Inspection is your final line of defense, and the lid is not the barrier. You are.
Compliance and Standards
In South Africa, a trunking lid must meet SANS 10142-1. This standard governs low voltage wiring and mandates regular verification of enclosure integrity. A failed inspection voids the certificate of compliance, leaving an installation exposed.
Compliance standards do not stop at initial installation. They require evidence of ongoing care. I have seen auditors check thermal discoloration and clip tension before opening the panel! The cover must satisfy these checks with measurable consistency.
- Verify the lid’s material rating matches the environment.
- Confirm all securing clips engage with audible feedback.
- Document every inspection with a dated record.
Maintenance and compliance merge when the lid’s performance is quantified against the standard. Without that discipline, the cover becomes a liability instead of a safeguard.

0 Comments