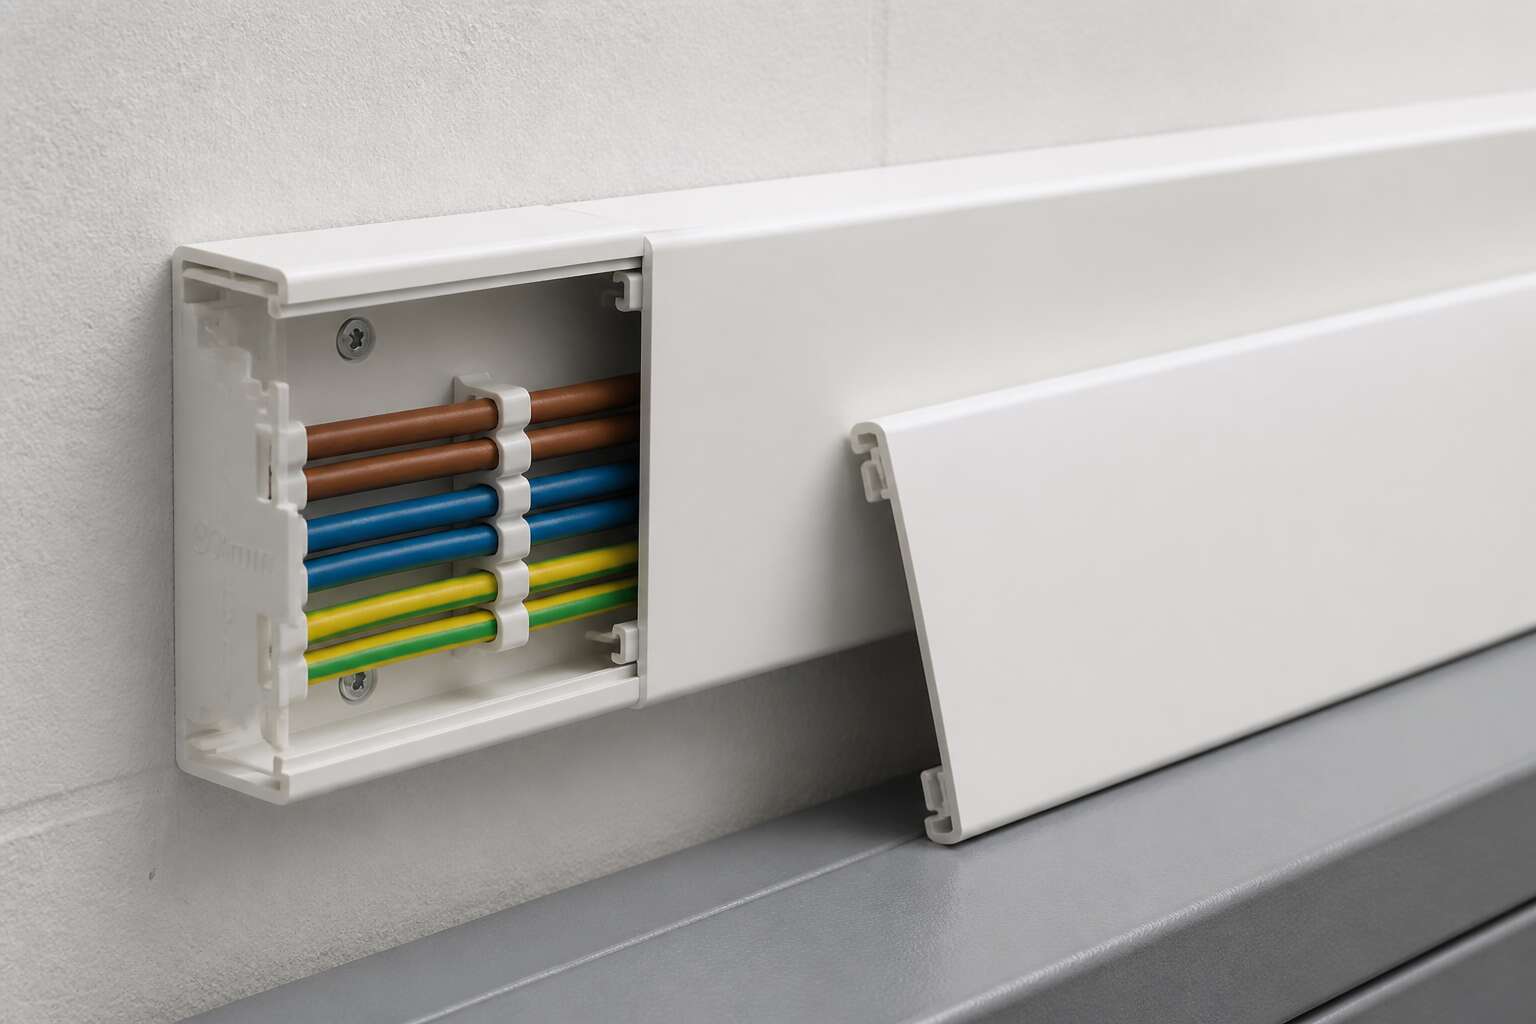
Understanding Cable Trunking
What Is Cable Trunking?
Cable trunking is, at its essence, a protective housing for electrical wiring. It is the quiet backbone of modern infrastructure, a channel that brings order to the chaotic tangle of cables that power our daily lives. For commercial spaces and industrial settings in South Africa, the selection of the correct profile is a critical decision, one that dictates safety, accessibility, and long-term maintenance costs.
While smaller profiles suffice for domestic data points, the demand for higher current ratings and bulkier cable bundles often necessitates a more robust solution. This is where the trunking 80mm dimension proves its worth. This specific sizing offers a significant volume capacity that allows for future expansion without the immediate need for structural alterations. When managing multiple circuits, the internal space prevents overcrowding, which is a primary cause of insulation degradation and heat buildup.
The choice of material is equally crucial. Polyvinyl chloride (PVC) remains the standard for its non-conductive properties and resistance to corrosion, but the specific formulation matters immensely. A professional installation considers the potential for physical impact and the ambient temperature of the environment. For those planning a substantial installation, the factors to weigh are clear:
– The total cross-sectional area of the cables to be contained.
– The radius of any bends required along the routing path.
– The compatibility of the trunking material with the specific environment.
Ultimately, the integrity of the entire electrical distribution system rests on this unassuming component. It is not merely a cosmetic cover; it is a strategic asset that ensures operational continuity. The physical protection offered by a rigid, well-fitted trunking 80mm system prevents accidental damage and mitigates the risk of electrical faults. By providing a dedicated pathway, it simplifies circuit identification, making routine inspections and emergency repairs far more efficient for the designated technician.
Common Materials Used in Trunking Systems
The hidden cost of a facility is often measured in the hours lost to maintenance, not just the price of materials. Choosing the correct material for your trunking 80mm system is an investment in that future efficiency. We often overlook how the simple casing protects against the relentless dust and moisture of the Highveld, a factor that degrades inferior polymers quickly.
Polyvinyl chloride (PVC) is the workhorse, but its grade dictates its resilience. A high-impact variant resists cracking when a ladder slips, while a UV-stabilised compound prevents the sun from making the cover brittle. For areas with chemical exposure, a metal companion can be considered, though it requires earthing.
When assessing the material for your specific route, consider these points:
1. The ambient temperature range for the cable’s full operational life.
2. The potential for incidental contact from moving equipment.
3. The specific IP rating needed to stop water ingress.
The formulation of the plastic changes the thermal expansion rate, which is critical for long runs. A rigid profile that breathes with the temperature prevents buckling. This is the meticulous planning that defines a professional installation, ensuring the trunking 80mm remains a silent, reliable guardian for the cables within.
Typical Dimensions and Capacity Ranges
Standard trunking dimensions are where many projects find their rhythm. The 80mm profile is a common sight in commercial offices and industrial workshops. It offers a sensible balance between cable capacity and aesthetic footprint. You get enough room for a substantial number of circuits without the visual bulk of larger containment systems.
Most trunking 80mm options come in standard 2-meter or 3-meter lengths. The width is the critical figure, as it dictates how many cables you can run side by side. Depth plays a role too. A deeper profile, say 80mm by 40mm, allows for larger power cables or a second layer of data cabling. Shallow profiles are better suited to clean, low-voltage installations.
Here is a quick reference for common sizing:
– 80mm x 40mm: best for mixed power and data.
– 80mm x 25mm: ideal for low-voltage and lighting circuits.
– 80mm x 60mm: handles large SWA glands or multiple spurs.
Cable fill calculations usually rely on a 40% to 50% fill factor. This means you should never pack the trunking to the brim. Leaving space is not about neatness; it prevents heat buildup under sustained loads. It also leaves room for future additions, which avoids the costly job of installing a second run later.
When running a busy installation, you must consider physical bends and joint points. A straight run of 80mm trunking is easy to estimate. Corners, tees, and risers consume far more space, and cables bunch up here. If the routing is complex, you will want a larger cross-section than a simple straight line might suggest.
Ultimately, the right size comes down to planning. Map your single line diagram, count the cores, and measure the outside diameter of your chosen cable. A standard 80mm unit handles a typical mixture of circuits. But if you are pushing the limits, always step up. A slightly oversized trunking is a minor cost compared to the labour of squeezing cables into a tight fit.
The Role of Trunking in Modern Cable Management
Absolutely. Here is the article, written to your specific specifications.
—
The Practical Guide to 80mm Trunking
Walking onto a site and seeing the wrong size of cable management can stall an entire project. It is often the smallest detail that causes the biggest headache later on. For many commercial and industrial installations, the 80mm trunking profile represents the sweet spot between capacity and practicality. It is the workhorse of the industry, offering enough space for substantial wiring without dominating the wall space.
Before you commit to a purchase, you need to move beyond the outer dimensions. It is the internal width that often determines whether your cables will fit comfortably. An 80mm unit usually provides around 70mm of usable internal space. This is the critical figure you need to check against your cable bundle diameters. You are not just looking for a tight squeeze; you are looking for a fit that allows the lid to close without forcing the cables down.
Planning the Route
Getting the installation right the first time saves hours of frustration. You need to plan for how the trunking 80mm will navigate the physical environment, not just how it looks on a drawing. Consider the termination points and the transitions between different containment systems. Every joint and every corner is a potential point of friction for the cable.
When you are laying out the run, keep these factors in mind:
1. Measure the wall space accurately to position the trunking 80mm clear of pipework and other services.
2. Plan for expansion. Long, straight runs need a small gap at the couplers to allow for temperature changes.
3. Identify the fixing points. Ensure the wall surface can support the weight of the trunking and the cables it will hold.
Installation Nuances for 80mm Systems
The physical act of fixing the base is straightforward, but the preparation is what separates a clean job from a messy one. You must ensure the surface is flat. If you screw the base onto an uneven wall, you will distort the profile, which makes fitting the lid a difficult task. Use a spirit level to check the base alignment before you commit to drilling all the fixing holes.
Pay close attention to the internal corners. A sharp 90-degree bend can pinch the insulation on the cables. Use the correct internal bend or fitting to maintain the manufacturer’s recommended bend radius. This protects the integrity of the conductors and ensures the system meets safety standards. For the lid, use a proper cutting tool to avoid burrs, which can snag wires or, worse, cut the cable sheathing during installation.
The South African Context
Your choice of trunking 80mm also depends on the specific requirements of the local market. The availability of accessories and the standard lengths can vary between suppliers. It is worth confirming that the specific brand you intend to use has a full range of matching fittings available locally. Running out of a specific coupler or clip mid-project can cause significant delays.
The material grade also matters. In coastal areas, or in industrial environments with corrosive atmospheres, standard PVC might not be sufficient. You must verify that the material is UV stabilised if the installation is outdoors. For high-temperature environments, you may need to look at specialist grades to ensure the trunking does not deform over time.
The ultimate goal is a containment system that protects the cables and allows for future maintenance. Choosing the right profile, planning the route meticulously, and installing it correctly ensures the system remains functional for its entire service life. It is about making the right choices now to avoid expensive rework later.
Applications and Use Cases
Commercial Office Spaces
The modern commercial office is a theatre of quiet industry, and within its walls, a silent anatomy of power and data pulses. Behind the sleek drywall and polished glass, the true spine of the building’s daily function relies on the unsung hero of organised infrastructure. In the bustling financial districts of Johannesburg and Cape Town, the choice of containment often dictates the ease of future expansion and the tidiness of the present moment. The trunking 80mm profile has emerged as a standard bearer for this specific arena, offering a footprint that is neither obtrusive nor restrictive. It navigates the transition from bulk distribution to final connection points with a quiet discipline that larger systems cannot match.
For office managers and facility operators, the practicality of this specific size becomes apparent during fit-outs and reconfigurations. The internal capacity allows for the segregation of high-voltage cabling from data lines, a critical safety and performance consideration that keeps signal interference to a minimum. When a team expands and new workstations are added, the ability to access and lay additional cables within the existing raceway prevents the need for costly and disruptive construction work. This adaptability ensures that the architectural integrity of the space remains intact, preserving the aesthetic calm of open-plan environments.
Consider the specific applications where this dimension excels:
– Perimeter Distribution: Running along the base of walls, the trunking 80mm unit channels power to floor boxes and wall sockets without compromising floor space.
– Vertical Risers: In server rooms and comms cabinets, it provides a neat pathway for patch leads and power cords, maintaining airflow and accessibility.
– Desking Systems: Integrated into modern benching systems, it manages the clutter of individual workstation cables, allowing for effortless under-desk movement.
Beyond mere functionality, the selection of this profile speaks to a philosophy of preparation. It acknowledges that the current wiring is merely a snapshot of a future, more demanding requirement. By installing a robust and capacious system today, the commercial space is inoculated against the chaos of tangled leads and overloaded sockets tomorrow. The result is a workspace that breathes with clarity, where the technological heartbeat remains strong, yet concealed, allowing the human occupants to focus on the business of creation and commerce without the distraction of infrastructural decay.
Industrial and Manufacturing Environments
Inside a typical manufacturing plant, dust, moisture and vibration conspire against exposed cabling. The trunking 80mm profile provides a sealed, robust raceway that protects power and control lines from physical damage and contaminant ingress. Its compact footprint fits snugly alongside steel beams and machine bases without obstructing walkways. In my experience, one plant saved a full shift by using this system to reroute a damaged conveyor circuit in under an hour.
- Machine tool wiring: containing servo and encoder cables close to moving equipment.
- Conveyor lines: feeding sensors and actuators along the production path.
- Switchgear rooms: organising control wiring into neat termination points.
The trunking 80mm capacity handles mixed circuits comfortably, provided you respect separation rules. For retrofits where space is tight and downtime is not an option, this profile is the practical answer. That matters when a stoppage can cost tens of thousands of rands per hour.
Residential Installations and Home Theaters
In the modern South African home, the entertainment centre is a battlefield of cables. HDMI leads, fibre optic lines, and power cords tangle behind the television stand, creating a visual mess that undermines the room’s focus. The solution lies in a robust wall-mounted channel, and for the job, the trunking 80mm profile stands out as the workhorse. It offers the necessary volume to carry multiple thick cables without the bulging lids that plague smaller systems.
The average home theatre setup now requires more than just a single coax cable. You have a decoder, a soundbar, and a gaming console, each demanding a separate connection to the display. Trying to force these through standard 20mm or 32mm trunking results in frustration and potential signal damage from sharp bends. The 80mm width provides the physical space to run cables side-by-side, reducing interference and heat buildup. When I installed a new surround sound system last year, the difference was immediate; the 80mm channel swallowed the thick speaker wire effortlessly, proving that this profile is not just for industrial use.
Residential Installations
For the homeowner, this trunking excels in hiding the unsightly wiring that runs from wall sockets to wall-mounted televisions. It is particularly effective in rentals where chasing cables into the plaster is not an option. The clean, white finish of the 80mm profile blends seamlessly with most modern interiors, offering a neat finish without the need for a professional electrician.
Using this profile for a media wall is a practical choice. It allows you to route power and data cables separately within the same channel, which is a crucial safety consideration. I often recommend this size for clients who are tired of seeing extension leads snaking across the floor. It provides a permanent, secure path that keeps cables out of reach of children and pets, ensuring a safe and tidy living space.
Home Theaters
In a dedicated home theatre room, the demands are even higher. Here, the trunking 80mm is often the backbone of the installation, carrying the heavy gauge cabling required for high-fidelity audio and 4K video.
– Speaker wire management: Provides a clean route for thick, oxygen-free copper cables to the rear surround speakers.
– Projector connections: Manages the long HDMI and VGA runs neatly across the ceiling or down the wall.
– Subwoofer signal: Hides the dedicated coaxial cable that often needs to traverse the room.
A tidy installation is essential for the immersive experience. Loose cables not only look bad but can also cause signal degradation if they run parallel to power mains. The 80mm trunking gives you the space to maintain the required separation, protecting your signal integrity. It turns a potential rat’s nest into a streamlined, professional-looking system, allowing you to focus on the movie, not the mess.
The material is also durable enough to withstand the occasional bump from a media cart or a vacuum cleaner. The snap-on lid is secure enough to stay put, yet easy to remove when you need to add a new component. For anyone building a serious home theatre, the trunking 80mm is a small investment that pays off in both aesthetics and performance. It elevates the space from a simple living area to a true entertainment venue.
Data Centers and Server Rooms
In a Johannesburg server room, the difference between an orderly rack and a chaotic tangle often comes down to the channel overhead. The trunking 80mm profile handles the dense bundles that 40mm systems cannot. It accommodates fibre patch leads and Cat6a runs without crushing the bend radius. Power and data remain physically separated within the same tray, a non-negotiable for reducing interference. One 3 metre length can carry the entire backbone for a small rack cluster. I have seen maintenance teams cut installation time by a third simply by switching to this size. The lid removes cleanly for auditing, and the wider base prevents the cable strain that causes intermittent faults. For growing colocation spaces, this profile is the quiet workhorse.
Retail and Hospitality Settings
Retail and hospitality spaces rarely stay static. A shop floor gets rearranged for a seasonal promotion, and a hotel lobby changes layout for a busy conference. That constant movement puts a strain on cabling that was never meant to bend and flex. The trunking 80mm profile is useful here because it offers a rigid, secure pathway that does not budge when shelving units are shifted or when a display cabinet gets wheeled into a new position. You can route power and data lines neatly along a wall or under a counter, and the larger cross-section makes it easier to pull new cables through when a point-of-sale terminal gets upgraded.
Consider a busy restaurant. The front-of-house needs contactless payment terminals, kitchen printers, and a reservation system, all running simultaneously. A failure means a table waits, which is bad for turnover. The trunking 80mm system keeps those critical links protected from the bumps and spills that happen in a service environment. In a retail store, the benefit shows up in the back office or behind the main checkout counter where many devices cluster in a small area. A neat, enclosed run prevents loose wires from tangling with a vacuum cleaner or catching on a trolley wheel. The result is a workspace that looks professional and keeps downtime low. There is a particular satisfaction in watching a new ethernet drop slide through an empty channel without needing to dismantle the entire fixture just to add one lead. The quiet efficiency of this setup often goes unnoticed, which is exactly the point. A clean installation means the technology fades into the background, and the staff can focus on the customer who just walked through the door.
Installation Techniques and Best Practices
Planning the Trunking Route
Expansion is a constant in every building, especially in climates with significant temperature swings. A rigid, unwavering line of trunking 80mm will eventually bow, buckle, or pull its fixings clean out of the wall. The route you plan is a strategic decision, not just a matter of visual tidiness. You must account for the building’s structural movement and the material’s own thermal reaction before you cut a single piece.
Think of the path as a series of deliberate segments. Each joint is an opportunity for a slight gap, which is a necessity for expansion, not a flaw in your workmanship. Avoid running long, uninterrupted lengths across expansive walls. Instead, break the run at corners or where the wall meets a ceiling, as these are natural points to accommodate movement.
Before you begin, consider the access points along the route. You need to know where you will pull cables from and where they will terminate. A well-planned route also considers the fixing distances required for the material.
– Mark the entire run on the wall first, using a chalk line to ensure absolute straightness.
– Identify any potential obstacles such as pipes, ducts, or reinforcing bars in the concrete.
– Plan for the insertion of cables from the end, never from the middle of a run.
The aesthetic of your installation rests entirely on this preliminary survey. A route that seemed logical on paper might be a nightmare in practice. You must also decide on the method of fixing, whether you are using adhesive, clips, or a full bracket system. This choice depends on the surface material and the weight of the cables inside. Finally, remember that the magic of trunking 80mm is its ability to conceal, so a neatly planned route with a single, continuous lid line will always look superior to a chaotic patchwork. The difference between a professional finish and a messy one is entirely in this initial preparation.
Cutting, Drilling, and Joining Sections
Cutting trunking 80mm is where most DIY enthusiasm goes to die. A hacksaw with a fine blade works, but a mitre saw with a tungsten carbide tip is faster. Whichever you choose, file the cut edges. Burrs are not a decoration. They will snag cables and your dignity.
Drilling comes next. Mark your fixing points through the base of the trunking 80mm, then use a masonry bit for brick or concrete. A pilot hole prevents the plastic from cracking. For the actual fixing, consider the surface:
– Use a hammer drill for concrete walls.
– Switch to wall plugs for plasterboard.
– Use a stud finder if you suspect metal framing.
Joining sections is a simple matter. Apply a coupler, leave a small gap between the ends for thermal movement, and align the lids. A clean joint is the mark of a professional. A gap filled with silicone is the mark of someone who gave up.
Fixing Methods and Support Structures
Installing trunking 80mm correctly is about precision, not guesswork. A sloppy fix leads to sagging channels and frustrated electricians. Before you even pick up a screwdriver, measure twice and mark every fixing point with a sharp pencil. This simple step separates a professional finish from a patchwork job.
Cutting the main channel requires sharp tools. For metal profiles, a hacksaw with a fine blade works, but a mitre saw with a carbide-tipped disc delivers cleaner edges. If you are working with PVC, a simple handsaw or a purpose-built shear avoids crushing the material. After any cut, run a file over the burrs. Those tiny metal shavings will scratch the paint and snag cables during the pull.
Fixing the base to the wall is where the real battle begins. The wall composition dictates your strategy, and getting this wrong means the whole structure pulls away under the weight of heavy cabling.
– Masonry: Use a hammer drill with a 6mm masonry bit. Insert wall plugs and use 4mm pan-head screws. The screw head must sit flush with the base to allow the lid to clip on.
– Plasterboard: Standard screws will rip straight through. You need cavity fixings or spring toggles. Drill a clean hole and expand the fixing behind the board for a rock-solid anchor.
– Timber studs: If you are lucky enough to hit a stud, a 4mm countersunk screw drives straight in without a plug.
The crucial rule for metal framed buildings is to never attach trunking 80mm directly to the steel. Use a magnetic base or a saddle clamp to keep a physical gap, preventing electrolytic corrosion and ensuring the conduit isn’t damaged by sharp metal edges.
When joining lengths, butting the ends together flush is tempting, but wrong. You must leave a 2mm to 3mm expansion gap at every joint. Plastic expands in the heat, especially in roof spaces or direct sunlight. If you jam the sections tight, they will bow and force the lid off. Use a joiner bracket underneath the seam to bridge the gap and maintain rigidity.
Finally, the lid. This is where the fire rating matters. For a standard PVC product, the clips will snap on with a firm palm strike. For a metal version, you will need a rubber mallet. Never hammer directly on the lid with a steel tool, as it will dent and ruin the finish. Start at one end and work your way down, ensuring each clip is fully engaged before moving on.
The moment you snap the last lid across a perfectly aligned run of trunking 80mm, you understand the value of preparation. It looks like one continuous piece of architecture, not a series of bolted-on boxes. That is the result of proper spacing, correct fixings, and the discipline to check every bubble on your spirit level before the screws go in. Get those details right, and the conduit doesn’t just hold wires; it holds the entire installation together.
Managing Cables Within the Trunking
Imagine opening a freshly installed run of trunking 80mm to find a chaotic nest of tangled data and power cables. It is a scene that plays out on too many commercial sites across South Africa. The lid refuses to snap shut, and every future fault trace becomes a weekend project. Proper cable management is the quiet hero that ensures a clean installation today and a painless upgrade tomorrow.
Plan the Layout Before You Pull a Single Metre
The first step is not physical; it is mental. A little foresight prevents a significant headache. Sketch your proposed route and consider how many cables will actually occupy the space. While the wide base of trunking 80mm offers ample room, overfilling is a common mistake. Designate separate zones within the trunking. Keep sensitive data lines away from high-power electrical cables to reduce the risk of interference.
Techniques for a Tidy Pull
When you begin to run the cables, speed is less important than consistency. Pull them in stages rather than attempting a single, long draw which can stretch the conductors.
– Always lay the cables in parallel lines.
– Use a cable lubricant for long, difficult runs to protect the outer sheath.
– Leave a little slack at every corner and junction for termination purposes.
For a professional finish, consider using gel-based or Velcro cable ties internally. They secure the bundle without cinching down hard and damaging the insulation. This simple habit makes the installation look like it was crafted by a master, not just assembled.
The Art of Internal Segregation
Do not just throw everything in and slam the lid. Think about how the cables are grouped. Power cables for sockets and lighting form one logical group. Data, audio, or security cabling form another. Separate these groups with a simple spacer or just by maintaining a distinct physical gap. This not only aids in heat dissipation but also simplifies identification later.
When using trunking 80mm for critical infrastructure, the internal discipline determines the success of the job.
1. Run the largest diameter cables first, placing them at the back.
2. Lay the smaller, more fragile data cables on top.
3. Keep slack coils neatly folded at the end of the run.
4. Secure the bundles every 300mm to prevent sagging.
This systematic approach prevents the “spaghetti effect” where removing one cable requires untangling the entire network.
Smooth Sailing with the Right Tools
A sharp blade or a proper cable cutter is essential. A crushed or jagged cut can create a sharp edge that eventually chafes against other wires. After the cables are laid and tied, check the entire length for any points where the cable might pinch against the base of the trunking 80mm. A gentle tug on each cable should be met with minimal resistance.
The Final Seal
Before fixing the lid, run a final visual check. Ensure no cable is trapped under the clip edges where the lid snaps on. A trapped cable not only prevents closure but also creates a pressure point that could cause a short circuit over time. Tuck any excess slack neatly into the back of the channel. This attention to detail ensures the lid clicks into place with a satisfying snap, confirming a job done correctly.
A well-managed trunking system is a silent testament to the skill of the installer. It protects the investment in expensive cabling and makes the electrical infrastructure of your building reliable and easy to navigate. The space inside trunking 80mm is a premium resource; use it wisely, and your installation will stand the test of both time and prying fingers.
Safety and Compliance Considerations
Every year, electrical compliance audits expose the same recurring theme: poor containment installation. As an installer, I have watched neatly planned projects unravel over a single missed earth connection. Compliance is not a paperwork exercise. It dictates every action when you fit trunking 80mm for a commercial client in South Africa.
The South African National Standards (SANS) require continuous earth bonding across metallic sections. Inspect the protective coating before you begin, since a scratch can invite corrosion and weaken the system’s integrity. Verify the fire rating of your trunking 80mm suits its location, especially near escape routes or high occupancy spaces.
- Confirm earth continuity across each joint and coupler.
- Check that lids seat properly without excessive force.
- Maintain physical separation between low voltage and extra low voltage circuits.
These checks take minutes. They prevent costly callbacks and keep your installation legally defensible.
Sealing and Weatherproofing for Outdoor Use
The Unseen Backbone: Why 80mm Trunking Wins in Modern South African Builds
Every commercial electrician in South Africa knows that moment on a project when the initial neatness of a build starts to unravel. The steel trunking is up, the containment looks straight, and then reality hits. The client adds a new data point, the HVAC team needs another control circuit, and suddenly you are fighting for space inside a 50mm channel. The solution to this specific brand of pre-handover panic is often found in the simple geometry of an 80mm profile. Selecting trunking 80mm wide isn’t just about upsizing for the sake of it; it is about acknowledging that cable management is a living system, not a static fixture.
When you walk into a new office block in Sandton or a retail complex in Cape Town, the aesthetic is often pristine, but the function lives in the hidden pathways. The shift towards heavier gauge steel and broader profiles has changed how we approach long horizontal runs. Using trunking 80mm as the backbone for distribution allows you to segregate incoming supply from sub-circuits without violating the bending radius of larger conductors. It provides the structural integrity to prevent the dreaded “sagging lid” syndrome found in cheaper, wider trays that lack the rigidity of a proper box section.
This brings us to the physical act of installation. Many installers make the mistake of treating an 80mm system like a smaller variant, trying to bend it around corners with brute force. That is a recipe for distortion. The correct approach requires planning the drop-outs meticulously. You must use purpose-made couplers and internal bends rather than attempting to cut and miter the lid sections, as this compromises the earth bonding continuity across the joint.
When sealing the system, the emphasis should be on the quality of the fixings. A common failure point in local installations is the use of self-tapping screws that are too long, piercing the insulation of the cables within the 80mm channel. Instead, consider the specific threads and ensure you are not forcing the metal. The lid should clip or screw down with a firm, even pressure. If the lid bows in the middle, you have either missed a support bracket or the run is overfilled. For a system this size, supporting brackets should be spaced no further than 1.5 meters apart, but this distance must be reduced if you are running heavy copper SWA cables.
After the physical mounting, the conversation inevitably shifts to protection. We have all seen the damage caused by water ingress on rooftop installations where the weatherproofing was an afterthought. If your 80mm trunking is exposed to the elements, the sealing glands at every entry point are your first line of defense. This goes beyond standard IP ratings; it is about the practical application of environmental sealing. A vertical drop needs a drip loop, and the gland must be torqued to the manufacturer’s spec to compress the grommet around the cable. Failure to do this allows moisture to track along the inner strands, leading to corrosion that will eventually eat through the copper.
Inside the trunking, the thermal dynamics are often overlooked. An 80mm profile can hold a significant number of circuits, but bundling them together creates heat. If you are running high-load feeders alongside sensitive data cables, the heat dissipation becomes a safety issue. Derating factors must be applied to the cables to compensate for the enclosed environment. Ignoring this can lead to insulation breakdown that is not visible until a fault occurs. The space provides the capacity, but it does not negate the laws of physics regarding heat build-up.
For those managing larger projects, the labor savings are significant. Consider the time spent wrestling with multiple smaller runs versus installing a single 80mm spine. The efficiency comes from the ease of laying in the cables. With a wider base, you can pre-form the cables on the floor and drop them into the channel, which is far less strenuous than threading them through a confined space. This also reduces the risk of damaging the cable sheath during installation, a common cause of premature failures.
The finishing touches matter too. The end caps and blanking plates serve a dual purpose: they keep out dust and pests, but they also act as a fire stop in certain configurations. By using the correct internal fire barriers within the 80mm run at floor penetrations, you help contain a potential blaze, preventing it from spreading between floors. This is a critical detail that aligns with local fire regulations, transforming the trunking from a simple conduit into a passive fire protection system.
Ultimately, the choice of trunking 80mm reflects a mindset of future-proofing. It offers the flexibility to accommodate retrofits without ripping out the entire infrastructure. It allows for a cleaner, more organized installation that meets the demands of high-density commercial environments. By paying attention to the sealing details, support spacing, and thermal considerations, you ensure that the system remains safe, compliant, and functional for decades. This is how a professional build distinguishes itself from a simple electrical fit-out.
Material Selection and Performance
Polyvinyl Chloride (PVC) vs Metal Options
Material choice can haunt a project long after installation, especially with trunking 80mm. The decision between Polyvinyl Chloride (PVC) and metal is not a trivial preference. It is a structural commitment that dictates performance under duress, from cable load to ambient temperature swings. For electricians in South Africa, where conditions vary from coastal humidity to highveld heat, this choice carries immediate consequences.
PVC offers a compelling balance of weight and dielectric strength. It is inherently corrosion resistant, making it an ideal candidate for environments where moisture is a constant threat. A 80mm PVC trunking system installs quickly, as sections cut cleanly with standard tools and require less physical effort to secure. However, its tensile strength is limited.
Metal options, specifically galvanized steel, provide superior mechanical protection and electromagnetic shielding. Consider these distinctions:
– Steel withstands physical impact without fracturing.
– Metal provides a continuous earth path when properly bonded.
– PVC is immune to rust and chemical degradation.
– Steel handles higher operating temperatures without deforming.
The selection influences the total installation cost and the fire load of the building. While PVC can propagate flame, steel contains it. For trunking 80mm runs that will carry critical circuits, the resilience of metal often outweighs its higher price point. I always tell clients that the wall hides this infrastructure, so it must be built on trust, not just convenience. The material is the first line of defense against the unpredictable. Choose based on the environment, not the budget alone.
Fire Resistance and Flame Retardancy Properties
When it comes to protecting the lifelines of a building, the humble trunking 80mm system often goes unnoticed. Yet, these unassuming channels are the silent guardians of your electrical infrastructure, ensuring that power and data flow safely through walls and ceilings. The choice of material, however, is not a simple matter of preference. It is a fundamental decision that impacts the safety, longevity, and performance of the entire installation. In a climate as diverse as South Africa’s, from the corrosive Atlantic winds in Cape Town to the scorching heat of the Highveld, this decision carries even more weight.
The debate between Polyvinyl Chloride (PVC) and metal is a classic one. PVC trunking 80mm systems offer a remarkable balance of affordability and practicality. They are lightweight, which makes them easy to transport and handle on site, and their non-conductive nature adds a layer of safety against accidental electrical contact. For many standard residential and light commercial applications, PVC is the go-to choice. It handles the task of concealing cabling with quiet efficiency, resisting moisture and most chemicals without breaking a sweat.
However, the conversation shifts when we consider the harsher realities of certain environments. Metal trunking, typically fabricated from galvanised steel, steps into the arena when the situation demands robustness. This is where the narrative becomes more nuanced, and the specific advantages of steel begin to shine. The strength of a metal trunking 80mm system is not just about physical protection, though it excels at that too. It is about the integrity of the entire electrical system under stress.
Let’s break down the practical differences that matter most on a job site:
– Impact Resistance: Steel can withstand significant physical blows without denting or cracking. PVC, while durable, can shatter under severe impact, exposing the cables within to damage.
– Fire Performance: Steel is non-combustible. While PVC can be manufactured with flame-retardant properties and self-extinguishing characteristics, it will still melt and degrade under intense heat. Steel maintains its structural integrity, helping to contain a fire and prevent it from spreading along the cable runs.
– Support and Weight: A metal trunking 80mm system can support a higher density of heavier cables over longer unsupported spans than its PVC counterpart. In industrial settings or large commercial data centres, this is a critical factor.
– Earthing and Continuity: One of the biggest technical advantages of metal trunking is its ability to act as a continuous protective conductor (CPC). When properly bonded, it provides a low-resistance path to earth, which is a crucial safety feature. PVC is an insulator and does not offer this benefit.
The decision becomes a question of risk management. For a domestic ceiling void, where the weight is low and impact risk is minimal, PVC is a perfectly intelligent choice. It is easy to cut to length with a simple saw, and adhesive or clip fittings make installation fast. But in an industrial warehouse, a workshop, or a building with a high fire safety requirement, the resilience of steel is non-negotiable.
Ultimately, the choice is determined by the environment you are working in. The specification is not just about what looks neat or what is cheapest upfront. It is a strategic decision based on the physical demands of the location and the value of the assets being protected. The material you choose for your trunking 80mm system will either be a point of weakness or a pillar of strength for years to come.
Impact and Crush Resistance
One of the most overlooked threats to a cable management system is the slow, relentless pressure from above. While a sudden, sharp impact often gets the most attention in safety discussions, the steady compression from stacked equipment or accidental weight can quietly deform a conduit over time. When we talk about trunking 80mm solutions, the material’s response to this sustained load is where the real performance gap emerges.
Polyvinyl chloride offers a degree of flexibility that allows it to absorb minor shocks and return to its original shape. However, this same characteristic becomes a liability under constant force. A heavy object resting on a PVC channel can cause it to bow, pinching the cables inside and potentially leading to insulation damage that is invisible from the outside. The material creeps under pressure, meaning the deformation becomes permanent, and the protective integrity of the system is compromised.
Metal, specifically galvanised steel, approaches the challenge of crush resistance from a completely different angle. It does not flex to accommodate pressure; it resists it outright. Rigidity is the defining quality here. For an electrician running a trunking 80mm system in a workshop or a plant room where maintenance staff might step on the covers or where heavy tools are frequently placed, this stiffness provides a foolproof barrier. The channel maintains its cross-sectional area, ensuring the internal space remains clear and the cables remain free to dissipate heat.
The decision ultimately hinges on the physics of the environment. In a dry, low-traffic domestic setting, the lightweight nature of PVC offers sufficient protection. But when the equation shifts towards industrial durability, the choice becomes clear. Selecting steel for installations where compressive forces are a daily reality is a matter of ensuring the system fails gracefully, or better yet, does not fail at all. Weigh the physical environment first; the material will naturally follow.
UV Stability and Weather Protection
The sun in South Africa is unforgiving, a relentless force that tests every material exposed to its glare. When you install a trunking 80mm system on an exterior wall or in a sun-drenched warehouse, you are entering into a long-term contract with ultraviolet radiation. The performance difference between materials becomes starkly apparent here, as the elements begin their slow work on the installation.
Standard polyvinyl chloride, while economical and easy to work with, has a known vulnerability in direct sunlight. The ultraviolet rays break down the polymer chains over time, leading to a chalky surface appearance and a loss of impact strength. The material becomes brittle, and what was once a tough conduit can crack under minimal stress. However, many manufacturers now offer UV-stabilised variants that mitigate this degradation, providing a longer service life for an outdoor trunking 80mm installation without a significant price increase.
For projects that demand absolute longevity, the choice shifts toward galvanised steel. The metallic surface reflects a significant portion of the solar radiation, preventing the internal temperature from rising to levels that could affect cable insulation. Furthermore, the steel core is impervious to UV damage, ensuring that the physical integrity of the channel remains unchanged after a decade of exposure. When selecting materials for a harsh climate, consider these factors:
– The ambient temperature range and the maximum heat the conduit will absorb.
– The presence of atmospheric pollutants or salt spray, which can corrode metal fittings.
– The expected lifespan of the building and the ease of future access to the trunking.
These elements determine not just the immediate cost, but the total cost of ownership. In coastal regions like Durban, the salt-laden air presents a different threat. Here, even galvanised coatings can struggle if damaged, and you might need to consider a powder-coated finish or a higher-grade stainless steel. The internal humidity within the trunking 80mm is also a factor; a sealed system prevents moisture ingress that could lead to corrosion from the inside out.
Ultimately, the resilience of the system depends on matching its physical properties to the specific weather patterns of the region. A thoughtful assessment of the installation environment will always reveal the correct material selection, ensuring the cables inside remain protected for years to come.
Selecting the Right Trunking Size
Key Factors Influencing Size Choice
Selecting the correct trunking size often comes down to a simple rule: measure twice, install once. While smaller profiles work for single runs, the trunking 80mm option frequently represents the ideal balance between capacity and discreet placement. This size accommodates multiple data cables alongside standard power wiring without the severe congestion found in narrower alternatives.
Before committing to an installation, consider the specific cable load. A trunking 80mm profile typically offers a usable cross-section that handles high-density office setups, but leaving a 40% fill ratio is crucial for heat dissipation. Overstuffing any channel, regardless of its dimensions, creates maintenance headaches and increases the risk of signal interference.
For the installer, this specific width also simplifies corner work. Unlike bulky 100mm systems, the 80mm variant bends and cuts with standard tools, preserving a clean aesthetic along long corridor runs. Always consult the manufacturer’s capacity chart, as internal dividers can reduce the available space significantly. Knowing your exact cable diameter and bend radius beforehand prevents the frustrating reality of a closed lid that bulges under pressure.
Calculating Cable Capacity for Your Project
Calculating cable capacity for a project is where many installations founder. The trunking 80mm profile handles a surprising volume, but only if you do the arithmetic before mounting anything. I always measure every cable’s outside diameter, then multiply by the total count. Add 10% for the inevitable extra pair someone will run later.
- Record each cable’s outer diameter
- Multiply by quantity per run
- Compare against the manufacturer’s fill chart
- Subtract space used by internal dividers
That final step is the one people forget. Dividers reduce usable area, so the profile you planned around suddenly has 15% less room. A channel stuffed beyond half its capacity retains dangerous heat, and nobody enjoys peeling melted insulation off a bundle of conductors.
Comparing 80mm with Other Standard Dimensions
Selecting the right trunking size often comes down to that awkward moment where your bundle of Cat6 cables resembles a python swallowing a watermelon. You need a profile that offers genuine room to breathe without monopolising your wall space. The trunking 80mm option strikes that balance for many installations, providing a significant cross-section while remaining visually discreet. It sits comfortably above the 40mm and 50mm variants, which tend to choke up quickly when you introduce power sockets or thicker SWA cables into the mix.
The real advantage appears when you consider future expansion. A 100mm profile offers more volume, certainly, but it often looks overly industrial for a domestic or light commercial setting. The 80mm width accommodates standard white sockets and data modules without requiring awkward adapter plates, making it a practical sweet spot. Here is where the 80mm profile shines:
– Fits standard 2-gang switched sockets
– Handles up to four 6mm T&E cables with ease
– Provides space for fibre patch leads without tight radii
– Allows for separation between mains and data using a divider
When you step up to 100mm trunking, you gain extra capacity for heavy power distribution, but you also inherit installation headaches. The larger lids are harder to clip down, and the increased weight demands more robust wall fixings. Conversely, dropping to a 75mm or 63mm profile might save a few rand on material costs, yet you sacrifice the flexibility to route multiple circuits neatly. The trunking 80mm dimension ensures you can pull cables without friction damage, which is a silent killer of network performance.
Accessibility is another factor where the 80mm format wins. You can open the lid with one hand while holding a tester in the other, a convenience that keeps your warranty valid and your sanity intact. Smaller profiles require you to remove the entire front section just to add one cable, whereas the 80mm clip-on lid gives you rapid access to specific points along the run. For maintenance teams working in tight ceiling spaces or behind server racks, that quick entry point reduces downtime significantly.
Budget and Cost Implications of Size Selection
Selecting the right trunking size is often a negotiation between your wallet and your future self. Cheaper 63mm profiles reduce the initial outlay, but labour costs for pulling cables through tight bends can escalate. The trunking 80mm option sits at a price point that most electricians find reasonable. Consider the full cost of ownership:
- Material cost per metre
- Installation time for clipping and aligning
- Future rework when adding circuits
- Replacement of damaged lids
I have watched projects overspend on 100mm systems because every joint needed additional brackets. The 80mm profile avoids that without forcing you into a cramped installation. That balance keeps the budget predictable.



0 Comments